Showing posts with label seafood. Show all posts

Wednesday, June 22, 2011

Shrimp Fra Diavolo, Summer Edition

Menu: Shrimp Fra Diavolo, Summer Edition; Caesar Salad; Watermelon


Lessons learned:
  1. The summer edition works! The kids still don't eat it, though.
  2. Organic romaine + sourdough bread pieces + bottled Caesar dressing = easiest salad ever?
I've always loved the recipe for Shrimp Fra Diavolo in my America's Test Kitchen book.  It involves a whole bunch of garlic, a simple tomato and wine sauce, and lighting some shrimp on fire.  Over time, I've simplified it a bit to make it a simple but upscale weeknight meal.  Usually it calls for a can of tomatoes, but it being summertime and all, I decided to try out a fresher-tasting version.


Shrimp Fra Diavolo, Summer Edition

Half a pound of pasta (the original recipe suggests linguine, but I pretty much always use farfalle these days to make things more kid-friendly)
6 garlic cloves, minced
About three large fresh tomatoes, finely diced (and seeded if you prefer... I don't bother)
1/2 cup of dry white wine (something you would actually drink)
1/2 teaspoon sugar
1/2 teaspoon salt
1/2 teaspoon crushed red pepper (if you take your spice seriously and want to make this extra fresh and summery, you can use a real hot pepper!)
1/2 pound large shrimp, peeled and deveined
Extra salt
About 1/4 cup cognac
1/4 cup fresh parsley, chopped
Parmesan or Romano cheese, grated to taste

Boil the pasta.  In the meantime, heat some oil on the skillet over medium-low heat and saute five cloves of the garlic until it turns golden.  Add the tomatoes with their juice, then the wine, sugar, salt, and pepper.  Increase the heat to medium-high and simmer it until much of the liquid has cooked off and it looks like about the right amount of sauce for your pasta... somewhere between 5-8 minutes.  Toss the pasta with the sauce and the last clove of minced garlic.  Yup: RAW.

Clean out your skillet and put it back on the burner over high heat.  When the pan is smoking, add a couple tablespoons of olive oil and then the shrimp, making sure they are all in a single layer.  Sprinkle them with just a couple of shakes of salt, and don't turn them for about a minute so they can brown nicely.  Once they have, turn each one over and add the cognac to the pan.  It should burn off pretty quickly, leaving the shrimp with a sweet, delicate essence.

Add the cooked shrimp to the pasta and sauce, then garnish with the chopped parsley and cheese.

This serves two hungry adults.

Thursday, April 28, 2011

Tropical Sushi

Menu: Sushi with Shrimp and Coconut-Fried Plantains; Edamame; Sliced Pears

Lessons learned:
  1. Tropical sushi is scrumptious!
  2. ... but next time I will cut the plantains into eighths, not fourths.
  3. Also, next time I need to make another nori sheet spread with rice.  Apparently Ben really likes to eat the rice that way, rather than loose.  I suppose that's reasonable.
Tuesday was sushi night, and I decided to change up my normal roll.  I think *certain* diners in my house might be getting a little tired of my old standby, the spicy tuna and avocado (even though they would never, ever go so far as to say so).  I'm a pretty conventional girl when it comes to sushi -- aside from the whole raw fish thing, which some of my favorite people see as decidedly unconventional, to put it nicely.  But one year for Christmas, someone gave me a little book of sushi recipes, so I checked that out to see if I could find some inspiration.  When I came across a sushi roll made with shrimp and plantain, I recalled the coconut-fried plantains I made several weeks ago and figured I'd try to actually put them in the roll.

When I went shopping the day before, I bought the ripest plantain I could find, which still wasn't all that ripe -- not nearly black, as Emily suggested last time.  I put it in a paper bag as soon as I got home and hoped for the best.  When I took it out to cut it up, I was relieved to discover that it was ripe enough to be a significant improvement over my last attempt.  I cut the plantain lengthwise into quarters, coated them in flour, then an egg/milk mixture, and finally the coconut.  Here they are frying in my pan:


Let me take just a moment to apologize for the photography in this post.  I'm not all that good to begin with, the lighting in my kitchen is terrible for pictures, and my camera doesn't seem equipped to remedy either of these setbacks.  Regardless, these tasted very good.  I know they could be even better if I could get a hold of a riper plantain (or plan far enough in advance to buy one in time for it to ripen completely in my kitchen).  But these worked quite well for that night.

In the same pan over high heat, I fried up 1/2 pound of large shrimp with nothing but some oil and a little salt.  Then I cut each of the shrimp in half crosswise so they would lay better in the roll.  (You can find my recipe/technique for sushi here.)  I rolled and cut the pieces, then mixed up a little mayo with lime juice, zest, and just a teeny tiny bit of chile sauce.  Here's (a disappointing photo of) what I ended up with:


And wow, I LOVED them!  Yum.  The only thing I would change for next time -- besides getting an even riper plantain-- is that the plantain sticks were too thick; they kind of took over the roll.  So next time I'll cut them in half one more time to have eight of them.  I also think the tropical flavor of these could be rounded out with a little pineapple.  Months ago, I accidentally bought crushed pineapple instead of chunks, so I just stuck it in my freezer to pull out if I ever make a smoothie or something (I never make smoothies).  But I think spreading a thin layer of that into these rolls could be fantastic.  I'll try it out and update below if it works!

I wish I could say the rest of my family loved these as much as I did.  John liked them ok, but after a few of them he was picking out the plantains; he said they were too thick.  He also doesn't love the texture of coconut, so if I'm feeling generous next time I might grind up my coconut into powder before coating the plantains with it.  The kids wouldn't try them, which is unfortunate because I really think it would be up their alley.  Ben ate rice on nori and pears, and Sophie ate pears.  At this point, if it's more than nothing, I call it success.

The other drawback here is that the quick preparation of sushi was a huge bonus for me.  When I have to actually cook the components of the roll, that advantage goes away.  But these were so good that I think it's definitely worth the extra time.

    Tuesday, April 19, 2011

    Pad Thai

    Menu: Pad Thai, Stir-Fried Broccoli, Sliced Pears

    Lessons learned:
    1. It takes 3 limes to get to 1/3 cup of lime juice.
    2. Just adding broccoli and pears means there's twice as much that Sophie could potentially eat.
    When I lived in Columbus, there was a place called Tai's Asian Bistro where you could get an enormous portion of good pad thai for less than $6, so it didn't seem worth it to find my own recipe.  But once I made it my mission to cook for my family every night and moved to a city where you can't find good restaurant pad thai at any price (Tallahasseeans, am I wrong?), I figured it was time to learn to make it myself.  I checked out several different recipes and found what looked like the best one in my cookbook from America's Test Kitchen.  They say it's good to use tamarind paste, but that you can substitute lime juice instead and it doesn't lose much.  Since I always have limes around and not tamarind, that's what I do.  I made a couple of other minor adjustments and added some Quorn cubes for my kids, who are spurning shrimp for the time being.


    I've been really heavy on the Asian noodle dishes these days, I know.  But this is definitely a winner around here.

    Pad Thai (adapted from The New Best Recipe from America's Test Kitchen)

    8 ounces rice noodles
    1/3 cup lime juice
    1/3 cup water
    3 tablespoons fish sauce
    1 tablespoon rice vinegar
    2-3 tablespoons brown sugar
    1/2 teaspoon cayenne pepper
    4 tablespoons peanut oil
    2 large eggs
    Salt
    1/2 pound medium shrimp, peeled and deveined
    1 medium shallot, minced
    4 garlic cloves, minced
    1/4 pound Quorn or firm tofu cubes
    2 tablespoons dried shrimp, chopped fine (optional)
    1/3 cup chopped or shredded carrots
    6 tablespoons chopped peanuts
    5 ounces bean sprouts
    5 medium scallions, green parts only, sliced thin on a sharp diagonal
    1/4 cup loosely packed cilantro leaves (optional)

    Cover the rice noodles with hot tap water and let them sit for about 30 minutes; they should be soft and pliable but not yet tender when it's time to use them.

    Combine the lime juice, water, fish sauce, vinegar, sugar, cayenne, and 2 tablespoons of the oil; set aside.  Beat the eggs with a dash of salt; set aside.

    Heat about a tablespoon of the remaining oil in a nonstick pan over high heat until it just begins to smoke.  Add the shrimp with a dash of salt; toss them to coat with oil and then let them brown on each side, for about 3 minutes total.  Transfer them to another dish and set them aside.

    Turn the heat down to medium and add the shallots, garlic, and protein cubes; cook them until they are just starting to turn brown.  Add the beaten eggs to the pan and stir them until they are scrambled and barely moist.  Add the rice noodles (drained of water, of course), the dried shrimp, and the carrots and stir for a few seconds.  Pour the lime juice mixture over the noodles, increase the heat back to high, and cook, tossing constantly, until the noodles are evenly coated.  Scatter 1/4 cup of the peanuts, the bean sprouts, all but 1/4 cup of the scallions, and the cooked shrimp over the noodles, and toss everything together until the liquid has been absorbed.  Garnish with the remaining scallions and peanuts and the cilantro.

    Makes a scant 4 servings... if I were serving 4 adults, I'd increase the proportions by 50%.

    Monday, April 4, 2011

    Coconut Rice Noodles with Shrimp and Mango

    Menu: Coconut Rice Noodles with Shrimp and Mango; Sauteed Broccoli with Garlic and Soy Sauce

    Lessons learned:
    1. I don't usually saute broccoli, but I will be doing it often from now on.  Tonight's was perfect.
    2. Don't forget to shake the can of coconut milk before you open it!
    Last time I made this, I didn't even finish my portion.  The only thing I could taste was watered down noodles.  But tonight I gave it another shot, and I think everyone is glad I did.  Even Sophie ate a varied dinner: mangoes, "naked nuggets" (Quorn tenders), carrots, and broccoli.

    I was good and cooked the broccoli first.  I don't know why I never saute broccoli, but I gave it a try tonight with peanut oil over medium-high heat.  After the broccoli had cooked for two or three minutes, I added some minced garlic and a couple splashes of soy sauce.  I let it cook for another two or three minutes, then decided it needed about 1/3 cup of water.  As soon as that boiled off, they were still just slightly crunchy -- perfect.


    Coconut Rice Noodles with Shrimp and Mango

    8 ounces rice noodles, medium thickness
    1/2 pound shrimp, peeled (deveining is good, too... I forgot tonight and we didn't notice)
    More protein for kids, if needed
    2 tablespoons peanut oil, plus more as needed
    1 tablespoon minced pickled ginger
    4 garlic cloves, sliced
    1/2 cup chopped or shredded carrots, your preference
    3 tablespoons fish sauce
    1 tablespoon sugar
    3/4 cup coconut milk, or maybe a little more if you like
    1 mango, cubed
    Crushed red pepper to taste

    Break the noodles (wrapping them in a dishcloth is helpful) and cover them with hot tap water.  Let them soak for about 25 minutes, not much longer or they'll get waterlogged.  Meanwhile, heat the oil in a large frying pan over high heat.  Prep the shrimp as needed and add it to the pan, letting it cook without stirring too much.  (Note: I now add Quorn tenders to many meals with shrimp so my kids get some protein and I can still say it's from the same meal.  I also happened to have some egg whites in my fridge, and I decided to use it with some cornstarch to coat the shrimp.  I don't think this recipe needs the egg, but if it just happens to be convenient for you, it works well.)  Cook the shrimp until it's pink on both sides, then take them out and put them aside.

    Lower the heat under the pan to medium-high and add more oil if necessary (it probably is).  Add the ginger, garlic, and carrots and stir-fry them for about 30 seconds.  Then add the fish sauce and sugar and combine them evenly with the other items in the pan.  Add the noodles, which should still be just slightly stiff and starchy.  Pour the coconut milk over the noodles, then stir them continuously to ensure that they absorb the flavors in the pan evenly.  Add the shrimp back to the noodles and stir in the mango, too.  Sprinkle with red pepper and you're done!

    This serves two adults and two kids pretty well.  John and I both had small second servings, as we usually do.

    Surf 'n Turf

    I've been trying to cut back on the amount of red meat we eat. Except for the occasional steak to grill we haven't really noticed. But there are days when my PMS is calling for some extra protein and iron in the form of red meat. Plus Grant really appreciates it when I make a bunch of his favorite dishes that also includes something for him to grill.

    Lessons learned:

    - Even if it's a really good cut of delicious grass-fed beef, rubbed down with yummy spices and grilled well, my girls still won't eat it.

    - Panko really does make the best breading for fried seafood.

    - I don't need anything to dip into the mango sauce. I could eat it on a spoon.

    The official menu: Grilled strip steak, beer-battered fried shrimp (regular and coconut) with mango sipping sauce, grilled peppers and onions, tri-color cous cous, boiled corn on the cob, twice-baked potato (the last bit of our Omaha Steaks Christmas present from my grandparents- we are mourning the emptiness of our freezer.)
    I obviously do not have mad food picture taking skills. Those white things that look like eggs are actually grilled onions. This is a picture of Grant's plate- he doesn't really like corn on the cob... The cous cous was mixed in with the veggies and the little mound on the other side of the steak is half of the last Omaha Steaks twice-baked potato.

    I will say this was the best batch of fried shrimp I have ever made. It was perfectly golden and lightly breaded and Grant and I devoured a 1/2 pound of jumbo shrimp. And since our closest grocery only sells beer in 6-packs or larger I have several Heineken's left in the fridge to enjoy.

    The girls ate cous cous and some veggies and I gave them some yogurt. Grant wants them to like meat but I say it just means more for us!

    Beer-Battered Fried Shrimp - Regular and Coconut
    Set out four bowls for dredging the shrimp.

    Bowl #1:
    enough flour to coat all of your shrimp

    Bowl #2:
    1 egg
    1/2 cup flour
    2/3 cup beer
    1 1/2 baking powder (I forgot I had recently run out of this and so I couldn't add it and I didn't notice a difference)

    Bowl #3:
    Panko

    Bowl #4:
    Shredded sweetened coconut

    Roll each shrimp in the flour, then the liquid mix, then either Panko or coconut.

    Place on a baking sheet covered in wax paper.

    Refrigerate for at least 30 minutes.

    Heat oil in a large pot- deep enough to cover one layer of shrimp. Heat it on medium or less. If the oil is too hot it will burn the shrimp and possibly pop and splatter drops of hot oil that may or may not hit the other hot burners on the stove where you are cooking and catch a kitchen towel on fire. It is quite possible I know this from experience.

    Fry the shrimp for about 2 minutes, flip and fry 2 more minutes. Drain on a paper towel.

    Serve with this amazing sauce:
    Mango Dipping Sauce (I've also done this with orange marmalade with equally pleasing results)
    Just mix these things according to your taste:

    Mango Preserves
    Brown, Dijon and/or Yellow Mustard
    Horseradish or Vinegar

    I've made all sorts of combinations using these ingredients and it is impossible to make it taste bad. I also use this as a marinade for fish.

    Wednesday, March 30, 2011

    Linguine with Spicy Clam Sauce

    Menu: Linguine with Spicy Clam Sauce.  The end.

    Lesson learned: Tuesday night dinners are about to get a lot simpler.

    Tonight I went to a regular running group that meets at 6pm... right when I would normally be cooking and serving dinner.  It was a good workout, so I decided I'm going to go every Tuesday, even though that means I won't be at dinner.  I'll have to make something earlier in the day that doesn't need to be served hot, or that John can easily just heat up: I'm thinking maybe pizza, sushi...

    But this week, I already had plans to make my favorite homemade pasta dish, linguine with spicy clam sauce.  Just about everyone who has been a guest at my dinner table has been served this meal, and my husband and I have been known to eat the entire pound ourselves over the course of one night.  It's addicting to the point where putting leftovers in the fridge early is my only hope.  Anyway, John found out great news at work, so I wanted to make it even though we wouldn't be able to eat together.  What's even better is that Ben always loves it, so that means it's a dinner that 3/4 of us will eat!  There aren't very many of those these days.

    I had plans to make a salad, too, but I ran out of time before I had to get the kids out the door and to the track.  Even when I don't have somewhere to go during dinner, I've often found that my vegetable dishes get short shrift unless I make them first.  I need to work on sticking to that order.  I'm also planning on putting out a plate of crudites around 6pm, the time at which Sophie has started bugging me for food like clockwork every night.

    I was disappointed to see that I had run out of linguine, so I had to make it with farfalle tonight.  Somehow not as classy, but still yummy.


    Linguine (or other pasta) with Spicy Clam Sauce

    1 pound linguine
    2 tablespoons olive oil
    2 medium shallots or 1/2 red onion, chopped
    4-6 large garlic cloves, sliced
    1 teaspoon crushed red pepper, or more to taste (I keep it mild for the kids)
    1 cup half and half
    3 6.5-ounce cans chopped or minced clams with juice
    2-3 teaspoons dried Italian seasoning
    1-2 ounces fresh basil, chopped
    Parmigiano-Reggiano or Pecorino Romano cheese to taste

    Bring a large pot of water to a boil and add pasta; cook to al dente.

    Meanwhile, heat the olive oil in a medium saucepan over medium heat and add the onion, garlic, and pepper.  Saute until the onions soften and the garlic is turning golden, then add the half and half and the clam juice, leaving the clams aside.  Add the Italian seasoning and bring the sauce to a steady simmer over medium-high heat.  Let the sauce boil down by about half as the pasta cooks.  Combine the thickened sauce with the drained pasta and toss with the clams, basil, and a generous amount of grated cheese.  Wait a couple of minutes before serving to allow the sauce time to cling to and soak into the pasta.

    Makes 4 generous servings; could be stretched to 6 with other courses.

    Tuesday, March 22, 2011

    Susan's Cioppino

    Menu: Cioppino; Garlic Bread; Lemon-Garlic Green Beans

    Lessons learned:
    1. It's awesome when someone else cooks.
    2. I mean, it's really, really awesome when someone else cooks!
    Cioppino ("chip-EE-no") is my husband's favorite home-cooked dish.  His mom made it for dinner right before she went into labor with him, and it's still one of her signature dishes 30 years later.  He's been putting in a lot of time at work, so she decided he deserved to have some when he got home tonight.  Woohoo!  It was delicious, especially because I didn't cook it!  And it requires wine, so since the wine was already open, my father-in-law and I finished off one of his favorites, a Monte Antico Sangiovese blend.

    Sophie ate only garlic bread.  Ben, however, couldn't get enough of the fish from the soup!  He probably ate 2/3 of what was in my first bowl, then had seconds.

    My mother-in-law says I can share her recipe, so here it is!

    Susan's Cioppino

    1/2 large green bell pepper
    2 tablespoons onion, chopped
    1-2 cloves minced garlic
    2 tablespoons olive oil
    14.5 ounces canned diced tomatoes, with juice
    8 ounces canned tomato sauce
    1/2 cup dry red wine
    3 tablespoons chopped fresh parsley
    1/2 teaspoon salt
    1/2 teaspoon Italian seasoning
    Fresh ground pepper to taste
    1/2 pound white fish, chopped
    1/2 pound sea scallops, chopped
    1/2 pound uncooked, peeled, deveined shrimp
    6.5 ounces minced clams, with juice

    Saute the green pepper, onion, and garlic with oil in a large pot over medium heat.  Add the tomatoes, sauce, wine, and seasonings.  Bring the soup to a boil, then lower to a simmer for about 20 minutes.  Add the fish, scallops, shrimp, and clams.  Return the soup to a boil briefly, then take it off the heat and serve with crusty garlic bread.

    Makes about 4 main course servings.

    Saturday, March 19, 2011

    Potstickers with Shrimp and Scallops

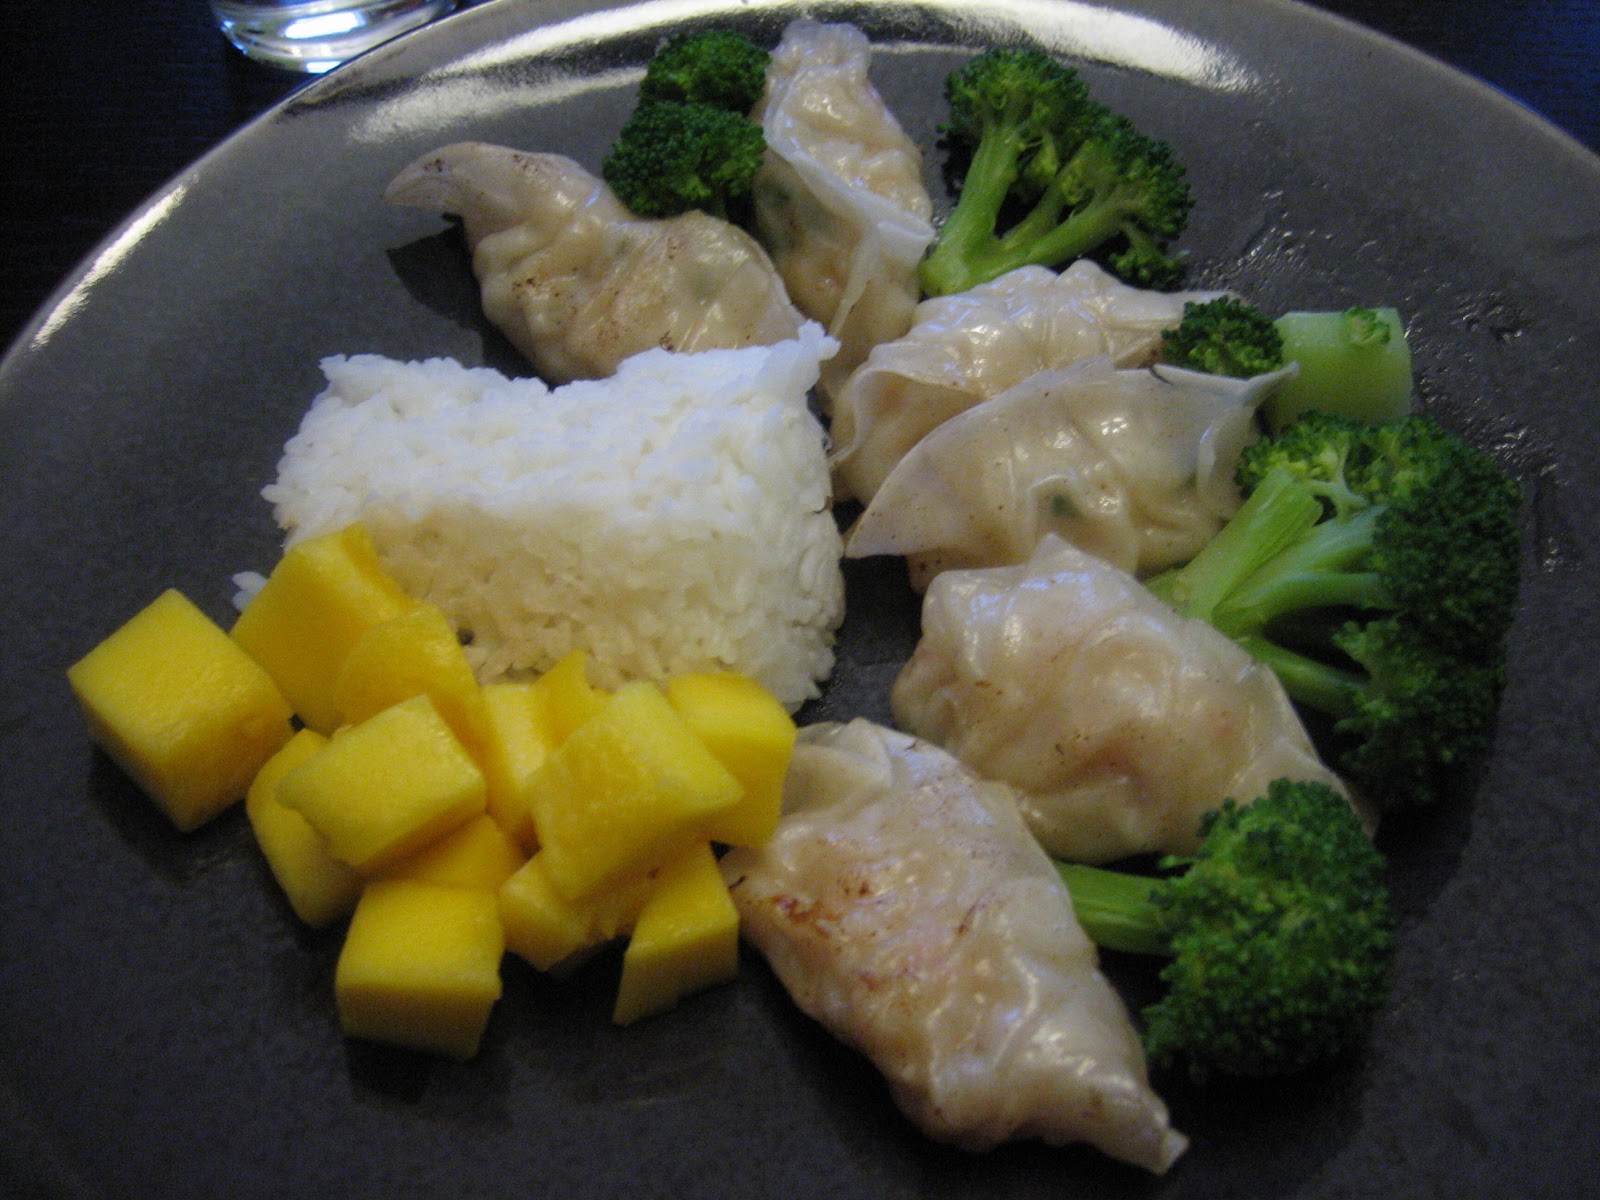
    Menu: Potstickers with Shrimp and Scallops; White Rice; Broccoli; Mango; Strawberries

    Lessons learned:
    1. This is one of the few recipes for which it's not worth it to buy the big sea scallops.
    2. Don't just make rice; make rice salad!

    My parents and I lived in China when I was a toddler, and my mom cooked many Chinese dishes on a regular basis when I was growing up.  She would make potstickers from almost-scratch, buying the wrappers from an Asian market and making her own filling, usually with pork.  She taught me how to fold them her way and pan-fry them, and I've made them ever since.  I LOVE potstickers.  I can't control myself around that fried dough.

    At American restaurants, potstickers are an appetizer and you usually get between 4 and 8.  My parents say that when they would eat big dinners with Chinese hosts, potstickers would come after the meal.  Bowls and bowls of them.  That's more my style; splitting 4 delicious fried dumplings with someone else just seems crazy to me.  And it's nice to know exactly what's in the filling when you make them yourself.  I've made mine with chicken and mango, pork and pumpkin, and this seafood filling.  Completely vegetarian ones are on my list next.

    This is my second time making seafood potstickers, and they turned out very well!  My in-laws, who got in this morning, said they were delicious.  However, I served them with pretty uninteresting sides, and the rice seemed kind of redundant.  Next time, I'll do a rice salad with more complex flavors.

    Since my in-laws were here to help with distracting the kids and dinner prep, we all got to sit down together (at the BIG table!).  My father-in-law opened a nice Chianti, which I will drink with pretty much anything.  My kids spent most of their time asking for more mango (Ben: "o pees? kay") and strawberries, but Ben did eat some of his potsticker and rice, and Sophie ate her broccoli.  I feel like she's barely eating anything these days, but I guess if she eats broccoli I should just calm down.

    You can totally make your own potstickers, too!  Get the square Na Soya wonton wrappers from most any grocery store around here, or the circles from an Asian market.  And you can fill them with anything you want.  Just make sure you have an ingredient to bind the filling together, such as an egg.  I got tonight's recipe from The Potsticker Chronicles by Stuart Chang Berman (a book with mostly non-potsticker recipes), and adapted it as you see it below.

    Potstickers with Shrimp and Scallops

    1 package of 40-50 potsticker wrappers
    3/4 pound small or medium shrimp, peeled and deveined
    3/4 pound scallops (I shelled out for sea scallops tonight, but I'm pretty sure I shouldn't have)
    1 tablespoon minced ginger
    1 tablespoon Hennessy
    2-3 tablespoons of chives, minced
    1 teaspoon salt
    1 teaspoon white pepper
    1 egg white (optional)
    1-2 teaspoons cornstarch
    1/4 cup oil, plus more as needed
    Soy sauce
    Rice vinegar

    If you forgot to take your potsticker wrappers out of the freezer in time for them to thaw completely, take them out of the plastic and stick them in the microwave for 30 seconds.  They'll be fine.  :)

    Next, start making the filling in one of two ways.  First, you can mince all your seafood by hand, in which case you will need the egg white.  Or you can do what I did, which is to put all my seafood in the small bowl of my food processor and pulse it until there weren't any huge pieces left.  Since food processors chop things unevenly, this meant that some of the seafood had basically turned to paste (very appetizing, I know).  I figured that meant I didn't need to bother with the egg, and I was right.  But the filling probably would have turned out more delicate if I had minced by hand and made it bind with egg.  Too late now, and they were delicious anyway!

    At any rate, once your seafood is no longer in big pieces, put it in a mixing bowl and stir in the other ingredients.  Take the mixture, a small spoon, your wrappers, and a little bowl of water to a work station, along with a baking sheet covered in parchment paper and dusted lightly with flour.
    Now you can start filling!  No matter what wrapper you're using, you want just a scant tablespoon of filling in each one.  Overfilling makes folding much more difficult than it needs to be.  If you use Na Soya wrappers, there are instructions on the package for making a wonton shape, which is fine.  Here is what I do with the round ones:
    Like my mom says, it really doesn't matter, especially if you're not Chinese.  But I do what she does, which is to fold the wrapper in half around the filling, and then make 4-5 small folds in the side facing me, keeping my fingers wet the whole time so the dough stays together once you've folded it.

    You can make these ahead of time, too, but I never end up doing it.  When you're ready to cook them, put some oil in a pan -- enough to cover the bottom -- over medium-high heat.  Arrange the potstickers in the pan comfortably; you may need to do two or even three batches, depending on the size of your pan.  When the bottoms of the potstickers are brown, dump in about 1/4 cup of water and quickly cover the pan.  This step is what cooks the filling.  Give it about 5 minutes, then uncover the pan and check one of the potstickers to make sure it's done.  If the outside looks good to you, take the potstickers out; if the water and steam have made the skins too soggy, let them fry a little longer after the water has boiled off.

    Serve the potstickers with dipping sauce made of 1 part soy sauce to 1 part rice vinegar.

    Of course, you can definitely boil the dumplings, too -- it's more authentic, and also healthier.  But for me, that's what makes the difference between being worth the time... and not.

    This amount was plenty for four adults and two kids.

    Wednesday, March 16, 2011

    Tuna Avocado Sushi

    Menu: Tuna Avocado Sushi; Edamame Pods; Coconut-Fried Plantains

    Lessons learned:
    1. Plantains are hard to peel.
    2. Uncooked plantains taste TERRIBLE.
    3. Coconut-fried plantains would probably be pretty tasty if they were ripe.
    I adore sushi.  It's delicious, filling, healthy, and easy to make.  Not even very expensive.  Hooray, sushi!  I've tried a few different homemade variations, but my favorite is still tuna and avocado.  John prefers salmon and mango, but I usually don't get salmon because I know the Atlantic variety isn't harvested sustainably.  I'm not sure about the tuna, but until I find out I still buy it.  Posting this photo makes me want to eat dinner again:
    I kind of like the inside-out sushi better -- with the rice on the outside -- but I haven't mastered that roll, so I'm just keeping it easy on myself.

    Or not.  It gets a lot more complicated when you do things like stir-fry the remaining fish for your kids and decide to make coconut-fried plantains!  What is wrong with me??  This is my easy dinner.  Or it was.

    I saw the idea to fry plantains in coconut in HTCEV and had to try it.  I really thought the kids would like them, and there are a couple of dinners I have where they'd make a fun addition.  But I don't know anything about plantains, except they look like bananas.  Turns out that when they're green, they're not as sweet.  Just like a banana.  Only much, much worse.  Blech.

    But after I coated them in coconut and fried them in safflower oil, they were decent.
    They would have been better if they were ripe, though.  In fact, unripened fruit was sort of a theme tonight.  Our avocado was NOT ready for consumption.  I still put it in the sushi, and fortunately the other components picked up the slack.  But back to the plantains -- my real problem with them is that I am never going to feel up to coating and frying all. those. little. circles.  However, I don't think they would lose much, if anything, if I fried long skinny strips instead of the circles.  They might be slightly less appealing to the kids, but honestly the little circles weren't exactly irresistible to them tonight anyway.

    We did manage a four-person table tonight.  The kids ate most of their food while I was still rolling, but they still came back to sit/play with John and me while we ate.  Ben even tried some sushi!  So, full table accomplished.

    Sushi doesn't really need a recipe, but here's one anyway.

    Tuna Avocado Sushi for Two

    1 1/2 cups sushi rice
    3 tablespoons rice vinegar
    1 tablespoon sugar
    1/2 teaspoon salt
    3 nori sheets
    1/3 pound fresh sushi-grade tuna
    1/2 ripe avocado
    Vegan mayo
    Chili paste
    Pickled ginger
    Wasabi paste
    Soy sauce

    Cook the rice using your preferred method.  In the meantime, dissolve the sugar and salt in the rice vinegar; when the rice is done, pour the mixture over it and mix it in well.

    Slice the tuna into long strips, about 1/2 inch wide.  Do the same for the avocado.  Lay out the nori sheets, smooth side down, and spread a thin layer of the rice mixture over each one.  Try to cover the whole thing.  On the edge closest to you, lay down a single layer of tuna, and a single layer of avocado just above it.  Using a rolling mat or just your hands, roll the sheet tightly from the nearest edge to the farthest one.  Using a very sharp cleaver or similar knife, cut the roll crosswise into eight equal pieces (I do this by cutting the roll in half, then into quarters, then into eighths).  Arrange cut-sides-up on a pretty plate.  Mix chili paste to taste into about 1/3 cup of vegan mayo, then top each sushi piece with your desired amount.  Serve with the ginger, wasabi, and soy sauce for dipping.