Showing posts with label entrees. Show all posts

Wednesday, June 22, 2011

Shrimp Fra Diavolo, Summer Edition

Menu: Shrimp Fra Diavolo, Summer Edition; Caesar Salad; Watermelon


Lessons learned:
  1. The summer edition works! The kids still don't eat it, though.
  2. Organic romaine + sourdough bread pieces + bottled Caesar dressing = easiest salad ever?
I've always loved the recipe for Shrimp Fra Diavolo in my America's Test Kitchen book.  It involves a whole bunch of garlic, a simple tomato and wine sauce, and lighting some shrimp on fire.  Over time, I've simplified it a bit to make it a simple but upscale weeknight meal.  Usually it calls for a can of tomatoes, but it being summertime and all, I decided to try out a fresher-tasting version.


Shrimp Fra Diavolo, Summer Edition

Half a pound of pasta (the original recipe suggests linguine, but I pretty much always use farfalle these days to make things more kid-friendly)
6 garlic cloves, minced
About three large fresh tomatoes, finely diced (and seeded if you prefer... I don't bother)
1/2 cup of dry white wine (something you would actually drink)
1/2 teaspoon sugar
1/2 teaspoon salt
1/2 teaspoon crushed red pepper (if you take your spice seriously and want to make this extra fresh and summery, you can use a real hot pepper!)
1/2 pound large shrimp, peeled and deveined
Extra salt
About 1/4 cup cognac
1/4 cup fresh parsley, chopped
Parmesan or Romano cheese, grated to taste

Boil the pasta.  In the meantime, heat some oil on the skillet over medium-low heat and saute five cloves of the garlic until it turns golden.  Add the tomatoes with their juice, then the wine, sugar, salt, and pepper.  Increase the heat to medium-high and simmer it until much of the liquid has cooked off and it looks like about the right amount of sauce for your pasta... somewhere between 5-8 minutes.  Toss the pasta with the sauce and the last clove of minced garlic.  Yup: RAW.

Clean out your skillet and put it back on the burner over high heat.  When the pan is smoking, add a couple tablespoons of olive oil and then the shrimp, making sure they are all in a single layer.  Sprinkle them with just a couple of shakes of salt, and don't turn them for about a minute so they can brown nicely.  Once they have, turn each one over and add the cognac to the pan.  It should burn off pretty quickly, leaving the shrimp with a sweet, delicate essence.

Add the cooked shrimp to the pasta and sauce, then garnish with the chopped parsley and cheese.

This serves two hungry adults.

Monday, June 20, 2011

Hoisin-Marinated Filet Mignon with Lime Compound Butter


It basically looks like a normal steak, right?  It's a filet, so unless I overcooked it, it's probably pretty good.  But how different could it be from any other steak you've enjoyed?

Well, I love a good steak, and this may have been the best one I've ever had.  I think it's official: this is the only steak marinade I will ever use: one part Worcestershire sauce to three parts soy sauce to six parts hoisin sauce, plus ginger to taste.  I'm not exactly sure how long the marinating process needs to take to achieve these results... I gave these steaks 24 hours.

I didn't want John to have to grill on his special day, especially because I think our grill needs a good cleaning.  So, paying no heed to the inefficiency of using the oven during summer in the South, I heated up my ovenproof skillet, seared the steaks on both sides over the range, then let them cook in the oven at 450 degrees.

Now despite what I've said so far, if I claimed that process went off without a hitch, I'd be lying.  First of all, I got my skillet so hot that the steaks started to char before they could really establish a good crust and cook for the full three minutes per side recommended by most how-to guides I've seen.  It ended up being only about a minute of searing per side, then I put the pan in the oven.

You may not know it to read my blog, but my husband and I have very similar tastes.  He and I have shared many of our best times over food.  We do have one major disagreement over the alleged satanic qualities of onions, but other than that we generally say "mmmmmm!" to the same concoctions.  However, when we order steaks at a restaurant, I make sure to eat mine so that only I can the inside of it, because my man just can't help but be a little repulsed by the idea of raw beef.  I order medium-rare, but I'd never send it back for being even redder than that.  But he likes a good, solid medium: pink enough so that the meat is still moist and tender, but cooked enough that a clear unraveling of proteins has occurred.  So I took my steak out after about six and a half minutes, and I gave John's steak eight minutes.  When you pay upwards of $20 per pound for filet, you damn well better not overcook it.

Well, mine was on the rare side of medium-rare, and I loved every second of it.  My husband loved his, too... until he started to get closer to the middle.  No problem, I said.  Stop right there, let the oven preheat, and we'll pop it back in.  That turned out to be a little bit more complicated than I anticipated: we had to take it out, test it, and put it back in three times before it looked good to him, and even then it was still slightly too red.  The steaks were pretty thick, after all.  Especially in light of the reduced searing time, I probably should have left his in for a good ten minutes the first time.  It sounds like an ordeal and maybe a disappointing Fathers' Day dinner for him, but he would want you to know that regardless of the cooking issues, the flavor on those steaks was amazing.

I made a compound butter by softening half a stick, mixing in some lime zest, garlic, Worcestershire sauce, and ginger, and re-chilling it in the fridge the day before.  Given how incredible the steaks tasted, it was completely unnecessary, but a nice addition all the same.

Sunday, June 12, 2011

Pasta ai Quattro Formaggi, Take One

Menu: Mac 'n Cheese Italian-Style; Fridge-Digger salad; Grapes


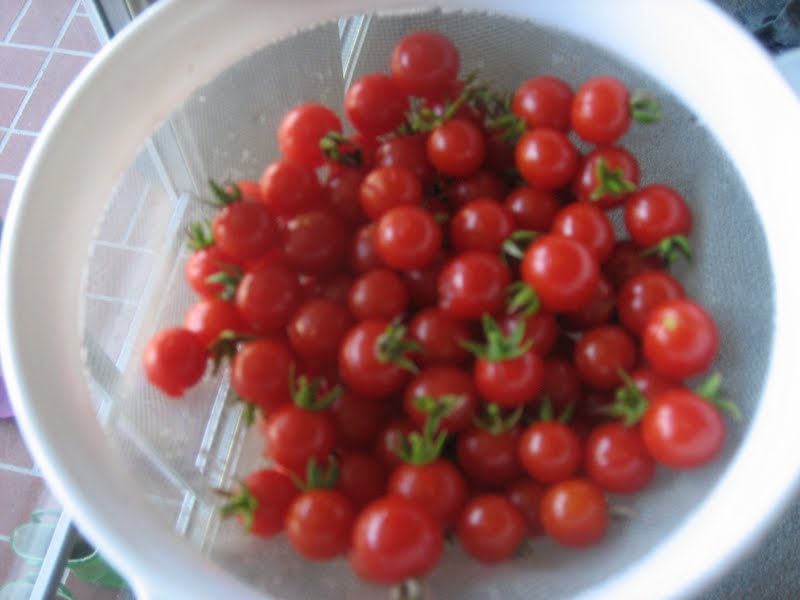
Going out back today, I discovered there were a whole mess of these:


So I grabbed them before anything else could.  I have more tomatoes than I can use.  Several bigger varieties are rotting on the vine.  I cannot tell you how sad that makes me.

I originally thought I might make two 8x8" pans of this dish and freeze one for another night, since these days I'm not home at dinner time on Tuesday or Thursday nights.  (That's a conundrum to discuss another time.)  But when I looked over the recipe, I realized that's it's actually not that kind of casserole.  Because of the need to preserve the integrity and flavor of the cheese, it seems like you pretty much have to bake it right after you've assembled it.  So I figured I would just score some (hopefully) delicious leftovers for lunch this week.

I have not had good luck with homemade mac 'n cheese in the past.  It's ALWAYS too milky.  But here's what came out of my oven tonight:


If anything, there wasn't enough sauce here, but actually I think it was almost perfect!  The focus is pretty much all on the cheese: fontina, gorgonzola, and pecorino romano (the recipe called for parmesan, too, but I didn't feel like buying it when I already had plenty of romano).  And the texture was everything I wanted it to be: crispy noodles on top, gooey cheesy pockets throughout.

However, I'm not going to post the recipe just yet because there are still some kinks I need to work out.  For starters, the original called for heavy cream and it really seems like you could get away with half and half here.    Also, it was a bit too salty, so next time I'm going to try it without adding any salt and using homemade bread crumbs instead of the packaged Italian ones I happened to have on hand.  Finally, the writers included a variation where you add tomatoes and I'm pretty sure I won't be able to resist trying that.

But if you're interested in this version, the basic idea is: cook some pasta until it's very al dente.  Meanwhile, make a bechamel sauce with a tablespoon each of butter and flour, then 1 1/2 cups of cream.  Put the drained pasta into a bowl, then put /14 cup each of fontina and gorgonzola on top, plus about 3/4 cup of romano.  Add some fresh Italian herbs if you've got 'em.  Pour the bechamel over everything, then cover it immediately with a lid of some sort to keep the heat in for a couple of minutes.  Stir it all up, then bake for 7 minutes at 500 degrees.

Anyway, all I knew going into dinnertime tonight was that I was, at long last, going to make the Italian version of mac 'n cheese that I discovered in my America's Test Kitchen cookbook.  No plans for vegetables.  I'm testing my hypothesis that if I just make a habit of grabbing the good-looking veggies and fruit when I go shopping and combine those with whatever I may have in the garden, I can pretty much ad-lib the veggies when it gets to be dinner time.  In my fridge, I found some spring mix on its last legs and some iceberg lettuce with barely one leg left.  Mixed it up with the little darlings you see above, some carrot slices, some homemade croutons (otherwise known as toast), and a nice red wine vinaigrette.  We ate it all.

Thursday, May 26, 2011

Grandma Mel's Tomato Sauce

From camera issues to computer issues. A couple of weeks ago Ben spilled water on our laptop and it would no longer turn on. Soooooo on the advice of friends and the Internet, we baked, yes BAKED, our computer in the oven at 175 degrees for 15 minutes. It worked! ...but only for a few days, when again it wouldn't turn on. Baked again, worked again, until it didn't. New computer!  The end.

Anyway.

Since I made it for company last Friday, I'm going to share with you one of the most valuable recipes I know.  I'll start at my beginning, although the story really begins long before that.  I met my husband in college.  He would often visit his aunt Carol, who lived not too far from campus, for dinner.  Not long after we started doing couple-y things together, he invited me over to her house for "spaghetti and meatballs."  I declined -- too much homework, and besides, I didn't like tomato sauce!  Undeterred, he brought some back for me (plus a brownie).  Well, I wasn't converted... not yet.  But I accepted the invitation the next time it was offered, and I tagged along with John to meet his mother's side of the family -- 100% Sicilian -- for the first time: his aunt (the kindest, friendliest, bubbliest woman I have ever had the pleasure to know) and his grandfather (who laughed for minutes on end when I told him how I had been repeatedly warned about his "inappropriate humor").  Unaware of the history of what I was being served, I politely (or really impolitely) asked to skip the tomato sauce so I could toss my pasta with the Good Seasons salad dressing on the table.  What can I say?  I was barely 18.

As I got to know my future in-laws, I learned that the smooth, meaty tomato sauce was actually the signature recipe of his grandmother Carmella, who died too early of ovarian cancer in 1997.  She loved organizing big family gatherings, for which a big pot of tomato sauce and several pounds of pasta is a perfect feast.  Over time, as her illness progressed, she taught her middle daughter, Carol, how to make her sauce just right -- because as with all the best sauces, of course, a written recipe will only get you so far.  In fact, legend has it that Carol couldn't get the sauce quite right until the first time she made it after her mother had passed on.

It's been ten years after that first night of pasta at Carol's house, and the family has celebrated numerous graduations, marriages, and births -- Mel's grandchildren are all grown up now.  But her three daughters still strive to get everyone together a couple of times a year, and when they succeed we always have Sauce.  It wasn't long before I learned to love it, and the year I married John, I asked Carol to teach me how to make it.  If the joy of being surrounded by people who love you unconditionally had a flavor, this is what it would taste like to me.  That probably sounds pretty cheesy.  But seriously, don't forget: it's gotta be Pecorino Romano.


Grandma Mel's Tomato Sauce

28 ounces canned tomato puree
18 ounces canned tomato paste
At least one bottle of good Chianti Classico, Grandma Mel's favorite wine
1 tablespoon olive oil
3-4 large cloves garlic, minced
2-4 bone-in pork ribs
1-2 bay leaves
Big pinch of sugar
Big pinch of baking soda
Salt and fresh ground pepper to taste
1 pound ground beef
½ pound ground pork
¼ bunch fresh parsley, chopped
1/4 cup of minced fresh Italian herbs (dried herbs to taste are fine, too)
2 eggs, plus more if needed
1 cup bread crumbs
½ cup fresh grated Pecorino Romano cheese
Extra Italian seasoning, salt, and pepper to taste
2-3 pounds of rigatoni or cappelini

Combine all the tomato products in a big stock pot. For every can of tomato paste, add three cans of water. You can use the water to get all the extra tomato off the sides of the cans.  Put the pot on the stove over low heat. Throughout the process, stir the sauce frequently so that the bottom doesn’t burn.

Now's a good time to open that wine.  Go ahead and pour a glass for yourself, and anyone else who wants one mid-afternoon (if you're among Sicilians, you'll have plenty of company).  This isn't supposed to feel like work.

Meanwhile, in a frying pan, heat a small amount of olive oil over medium heat. Add the garlic and sauté until it's golden, then add the garlic to the sauce using a slotted spoon, reserving the oil in the hot pan.  Add the pork ribs and brown them on both sides, then add them to the sauce. Next, add the bay leaves, sugar, baking soda, and seasoning.  Take your time.  Drink your wine.

In a separate bowl, combine the ground meat, herbs, eggs, bread crumbs, cheese, and seasonings, adjusting the ingredients so that mixture is not too dry or too moist. Roll the mixture into meatballs, brown them all over in the  frying pan in batches that work for your pan size, then add them to the sauce.

And now you can really sit down and enjoy yourself, because the real work is done.  For the next 2-3 hours, simmer the sauce uncovered, remembering to stir every now and again and doing a taste test every so often (or getting other people to do it).  Your main concerns are not letting the bottom burn and skimming off any tomato froth that may form on top of the sauce.  After about 2 hours, cook the pasta to al dente, drain, and toss with just enough sauce to prevent sticking.  Serve the pasta on individual dishes topped with sauce, meatballs, and grated Romano.  Eat, enjoy, and think of Grandma Mel.

Makes enough for at least 8 people.

Saturday, May 7, 2011

Penne alla Vodka, Take Two

Menu: Penne alla Vodka; Green Beans with Balsamic Vinaigrette; Fried Eggplant

Lessons learned:
  1. Penne alla vodka is on its way back in my house!
  2. I love, love, love to see my children eat my food.
  3. The fried eggplant is worth it. 
It's been a good day for food at my house.  I ran a Mothers' Day 5k this morning and came back to a lovely breakfast of waffles and maple syrup prepared by my husband.  Then I treated myself to a French dip sandwich and some Pringles for lunch, it being my special weekend and all.  Then tonight, I sliced, breaded, and fried the first eggplant from my garden this year.  I put them out with just some jarred tomato sauce for an appetizer, and they were gone before I could take a picture.  Next time.

After some searching and on many people's recommendations, I decided to try Rachael Ray's "You Won't Be Single For Long" Penne alla Vodka.  I used an adaptation that I found over on Smitten Kitchen.  It was very good, but still needs some adjustments.  For one thing, I ended up with about twice as much sauce as I needed.  I also think this dish is truly naked without salted pork, so I did add about 4 ounces of bacon.  I'll post my official version when I get it perfect, but you have to admit this looks (and tasted!) leagues better than my last attempt:


At this very moment, I'm trying to resist going back for thirds.  And failing.  But we refilled my son's plate FIVE times, so I'm going to be sleeping well tonight.

Thursday, April 28, 2011

Grilled Peanut Chicken

Menu: Grilled Peanut Chicken; Tropical Rice Salad; Stir-Fried Green Beans

Lessons learned:
  1. When buying chicken thighs, multiply the number of people you'll be serving by how many pounds of meat you think each of them might want to eat.  Then, add at least another half pound to that.
  2. Plain macadamia nuts = "why do people get excited about these?"  Macadamia nuts in tropical rice salad = very exciting!
  3. Brown rice was MADE for this salad.
For a few minutes, last night was a little disappointing.  John invited a couple from his department over for dinner last night at the last minute, so I changed my dinner plans in order to make something special.  Not a big deal; went out shopping for that.  After I got home and started cooking the rice, John got a call saying something came up and our guests wouldn't be able to come over after all.  So if I still cooked as planned, we were going to have a whole bunch of food.  I was kind of bummed about that, until I thought, wait, why would I be bummed about that?

The main question was, were we really going to go ahead and grill all 2.5 pounds of chicken I'd bought, or should I freeze half of it?  We decided just to go for it... whatever we didn't eat would keep for lunch the next day.

Let me back up.  We haven't made this in a while because of my no-meat-in-dinner experiment, but before that, grilled chicken thighs was one of our very favorite meals.  My mom used to make this amazing chicken when I was a kid, and I didn't realize that the reason it was so delicious was mainly because it was all dark thigh meat!  All she would do was make a recipe of Good Seasons Italian dressing, dump it in a bag with some chicken thighs, and bake.  SO good.  Most chicken recipes I see call for white meat -- I suppose because it's healthier -- so for a while, that's all I bought.  But forget that.  Thigh meat is more delicious and less expensive.  Once that light bulb went off, I've never gone back.

Anyway, I don't ever really make the same marinade twice; I always just start with sort of a general theme or inspiration, see what I have on hand that seems to fit with that, and throw everything in a bowl haphazardly.  Definitely no measurements.  Sometimes it works, and sometimes it doesn't.  Last night, though... um, yeah, you might say it worked.  You might say it totally rocked that chicken, and you would be correct.  You might also say it's a good thing that nobody else came over wanting any chicken after all, and that would be correct as well.


When I stopped cooking with meat, I wasn't really sure where or how long the experiment would go; I mainly wanted to see if it was possible, and I wanted to adjust the extent to which we (I) crave meat.  I'd say on both scores, it's been more successful than I anticipated, with the exception being that we eat bacon probably once every couple of weeks.  But two things happened yesterday that made me come to a decision about how far to take this.

First, I got a rare chance to go to the library by myself, where I naturally made my way to the cookbook section.  I discovered that the vegetarian cookbooks are relegated to the "health food" section, and are mostly filled with recipes that my family and I are just never going to be excited about eating.  I know that the library's selection isn't necessarily representative of everything that's out there, but it made me a little sad to realize that so many of the wonderful recipes in the majority of other cookbooks were no longer conducive to my diet.

Second, it's been a long time since I've seen my kids so focused on a meal.  As soon as they heard we were having chicken -- I mentioned it while I was cooking -- neither of them could stop talking about it and asking for it.  Chicken has always been one of the few things Sophie actually eats consistently, so cutting that out was a significant sacrifice (although we have mostly made up for it with Quorn).  After she ate all of her chicken, she came over to our plates to get more.  Ben, who is normally up and down during dinner, just sat there very quietly for several minutes on end, just eating and enjoying.  Now, I don't think the kids are deprived.  If I wanted to keep meat completely out of our dinners, they would be fine, as they have been since the beginning.  But seeing them eat like that just made me so happy.

So I think that sometime soon, I'm going to designate just one day a week where I make meat for dinner.  Maybe Saturday or Sunday, and it can be a special meal.  That way I can still try out delicious-sounding recipes for carnivores from time to time, and I think it would make my family a lot more excited about dinner -- always a good thing.  And to balance, I might also (more discreetly) designate one night a week as vegan.

Back to last night's divine chicken: unfortunately, as I said, I don't measure, but I'm going to attempt to reproduce what I did for the sauce here, because I'd like to be able to do it again next time.  If you make this, I strongly suggest that you read the amounts below as mere guidelines, and just put in what feels right to you.  Also, my husband is the grillmaster at our house and his technique is similarly ad-hoc, so keep that in mind.

The rice salad was really wonderful, too; I will address that in the next post.

Grilled Peanut Chicken

2.5 pounds chicken thighs (I used to spend a lot of time trimming the fat off, but now I don't bother... most of it melts off on the grill anyway, and you can always cut off whatever you want when you're eating)

3/4 cup creamy peanut butter
3 tablespoons rice vinegar
1/4 cup soy sauce
2 tablespoons brown sugar
2 teaspoons garlic powder
1 tablespoon powdered ginger
2 tablespoons orange juice

Put the chicken thighs in a large marinating bag.  Mix up the remaining ingredients in a bowl and pour it over the chicken in the bag, mixing it in evenly to coat all of the chicken.  Let it sit for about an hour.

Preheat the (gas) grill on high.  When it's ready, add the chicken and let it sear.  My husband does a lot of flipping unless I give him explicit instructions not to; some people say to flip only once, but his method seems to work for him.  He did lower the heat after a few minutes, and kept the meat covered when he wasn't flipping it.  The thickest pieces were on the grill for about 15 minutes, with the thinner ones coming off a couple of minutes before that.

Tropical Sushi

Menu: Sushi with Shrimp and Coconut-Fried Plantains; Edamame; Sliced Pears

Lessons learned:
  1. Tropical sushi is scrumptious!
  2. ... but next time I will cut the plantains into eighths, not fourths.
  3. Also, next time I need to make another nori sheet spread with rice.  Apparently Ben really likes to eat the rice that way, rather than loose.  I suppose that's reasonable.
Tuesday was sushi night, and I decided to change up my normal roll.  I think *certain* diners in my house might be getting a little tired of my old standby, the spicy tuna and avocado (even though they would never, ever go so far as to say so).  I'm a pretty conventional girl when it comes to sushi -- aside from the whole raw fish thing, which some of my favorite people see as decidedly unconventional, to put it nicely.  But one year for Christmas, someone gave me a little book of sushi recipes, so I checked that out to see if I could find some inspiration.  When I came across a sushi roll made with shrimp and plantain, I recalled the coconut-fried plantains I made several weeks ago and figured I'd try to actually put them in the roll.

When I went shopping the day before, I bought the ripest plantain I could find, which still wasn't all that ripe -- not nearly black, as Emily suggested last time.  I put it in a paper bag as soon as I got home and hoped for the best.  When I took it out to cut it up, I was relieved to discover that it was ripe enough to be a significant improvement over my last attempt.  I cut the plantain lengthwise into quarters, coated them in flour, then an egg/milk mixture, and finally the coconut.  Here they are frying in my pan:


Let me take just a moment to apologize for the photography in this post.  I'm not all that good to begin with, the lighting in my kitchen is terrible for pictures, and my camera doesn't seem equipped to remedy either of these setbacks.  Regardless, these tasted very good.  I know they could be even better if I could get a hold of a riper plantain (or plan far enough in advance to buy one in time for it to ripen completely in my kitchen).  But these worked quite well for that night.

In the same pan over high heat, I fried up 1/2 pound of large shrimp with nothing but some oil and a little salt.  Then I cut each of the shrimp in half crosswise so they would lay better in the roll.  (You can find my recipe/technique for sushi here.)  I rolled and cut the pieces, then mixed up a little mayo with lime juice, zest, and just a teeny tiny bit of chile sauce.  Here's (a disappointing photo of) what I ended up with:


And wow, I LOVED them!  Yum.  The only thing I would change for next time -- besides getting an even riper plantain-- is that the plantain sticks were too thick; they kind of took over the roll.  So next time I'll cut them in half one more time to have eight of them.  I also think the tropical flavor of these could be rounded out with a little pineapple.  Months ago, I accidentally bought crushed pineapple instead of chunks, so I just stuck it in my freezer to pull out if I ever make a smoothie or something (I never make smoothies).  But I think spreading a thin layer of that into these rolls could be fantastic.  I'll try it out and update below if it works!

I wish I could say the rest of my family loved these as much as I did.  John liked them ok, but after a few of them he was picking out the plantains; he said they were too thick.  He also doesn't love the texture of coconut, so if I'm feeling generous next time I might grind up my coconut into powder before coating the plantains with it.  The kids wouldn't try them, which is unfortunate because I really think it would be up their alley.  Ben ate rice on nori and pears, and Sophie ate pears.  At this point, if it's more than nothing, I call it success.

The other drawback here is that the quick preparation of sushi was a huge bonus for me.  When I have to actually cook the components of the roll, that advantage goes away.  But these were so good that I think it's definitely worth the extra time.

    Tuesday, April 19, 2011

    Pad Thai

    Menu: Pad Thai, Stir-Fried Broccoli, Sliced Pears

    Lessons learned:
    1. It takes 3 limes to get to 1/3 cup of lime juice.
    2. Just adding broccoli and pears means there's twice as much that Sophie could potentially eat.
    When I lived in Columbus, there was a place called Tai's Asian Bistro where you could get an enormous portion of good pad thai for less than $6, so it didn't seem worth it to find my own recipe.  But once I made it my mission to cook for my family every night and moved to a city where you can't find good restaurant pad thai at any price (Tallahasseeans, am I wrong?), I figured it was time to learn to make it myself.  I checked out several different recipes and found what looked like the best one in my cookbook from America's Test Kitchen.  They say it's good to use tamarind paste, but that you can substitute lime juice instead and it doesn't lose much.  Since I always have limes around and not tamarind, that's what I do.  I made a couple of other minor adjustments and added some Quorn cubes for my kids, who are spurning shrimp for the time being.


    I've been really heavy on the Asian noodle dishes these days, I know.  But this is definitely a winner around here.

    Pad Thai (adapted from The New Best Recipe from America's Test Kitchen)

    8 ounces rice noodles
    1/3 cup lime juice
    1/3 cup water
    3 tablespoons fish sauce
    1 tablespoon rice vinegar
    2-3 tablespoons brown sugar
    1/2 teaspoon cayenne pepper
    4 tablespoons peanut oil
    2 large eggs
    Salt
    1/2 pound medium shrimp, peeled and deveined
    1 medium shallot, minced
    4 garlic cloves, minced
    1/4 pound Quorn or firm tofu cubes
    2 tablespoons dried shrimp, chopped fine (optional)
    1/3 cup chopped or shredded carrots
    6 tablespoons chopped peanuts
    5 ounces bean sprouts
    5 medium scallions, green parts only, sliced thin on a sharp diagonal
    1/4 cup loosely packed cilantro leaves (optional)

    Cover the rice noodles with hot tap water and let them sit for about 30 minutes; they should be soft and pliable but not yet tender when it's time to use them.

    Combine the lime juice, water, fish sauce, vinegar, sugar, cayenne, and 2 tablespoons of the oil; set aside.  Beat the eggs with a dash of salt; set aside.

    Heat about a tablespoon of the remaining oil in a nonstick pan over high heat until it just begins to smoke.  Add the shrimp with a dash of salt; toss them to coat with oil and then let them brown on each side, for about 3 minutes total.  Transfer them to another dish and set them aside.

    Turn the heat down to medium and add the shallots, garlic, and protein cubes; cook them until they are just starting to turn brown.  Add the beaten eggs to the pan and stir them until they are scrambled and barely moist.  Add the rice noodles (drained of water, of course), the dried shrimp, and the carrots and stir for a few seconds.  Pour the lime juice mixture over the noodles, increase the heat back to high, and cook, tossing constantly, until the noodles are evenly coated.  Scatter 1/4 cup of the peanuts, the bean sprouts, all but 1/4 cup of the scallions, and the cooked shrimp over the noodles, and toss everything together until the liquid has been absorbed.  Garnish with the remaining scallions and peanuts and the cilantro.

    Makes a scant 4 servings... if I were serving 4 adults, I'd increase the proportions by 50%.

    Monday, April 11, 2011

    Italian Quiche

    I LOVE quiche. The first time I remember eating quiche was at Chez Pierre in Tallahassee about 10 years ago. I was invited to lunch for a friend's birthday and being a poor college-aged person I ordered the cheapest thing on the menu. Broccoli and Cheese Quiche. It was pure culinary delight at first bite. The silly thing that happened next was that it was years (YEARS!) before I ate it again...and then I had to learn to make it myself.

    At first I was totally intimidated...how could I make something that could ever compare to that first taste!? Turns out it's pretty easy...

    Lessons Learned:
    - I don't think there's anything I wouldn't eat in a pie crust smothered with eggs and cheese.

    - Double check the recipe BEFORE you make a pie crust... even an easy one.

    Official menu: Italian Quiche, green salad with craisins and sunflower seeds in Italian dressing, cantaloupe


    Italian Quiche

    1 easy pie crust:
    1.5 cups of flour (I used white flour this time but I want to try it with whole wheat)
    3 tablespoons olive oil
    1 teaspoon salt
    2 teaspoons white sugar
    3 tablespoons milk

    - mix with a fork in a 9x13 baking dish. press into bottom and slightly up sides.

    Saute or boil or steam your choice of chopped veggies.
    For this one I used:
    1 zucchini
    1 onion
    1 green pepper
    1 yellow pepper

    - spread the veggies over the crust.

    In a mixing bowl whisk together:
    8 eggs
    Milk (a couple tablespoonsish)
    Sage
    Salt and Pepper
    Garlic
    Basil
    (this is just what I used for our Italian version...but I mix it up according to the taste I'm going for)

    - pour over the veggies.

    Top with grated cheese. I used mozzarella and asiago.

    Bake at 350 until it is browning on top.

    Kid Note:
    Zola (age 3) wouldn't even try it...weird. But she ate handfuls of sunflower seeds and craisins. She also ate a bunch of cantaloupe. Niva (16 months) tried everything and ate most of it.

    Thai Rice Salad

    Menu: Vegetable Potstickers; Thai Rice Salad

    Lessons learned:
    1. I don't even miss the meat in these potstickers.
    2. It's not that Ben stopped liking rice.  He just doesn't want to eat it with his fingers anymore.  I guess that's reasonable.
    I don't remember the last time I enjoyed a Sunday this much.  And it was really because of everything I didn't do.  Didn't do chores.  Didn't run errands.  John made us breakfast!  Then we went running, then out to lunch at Chipotle.  Then we just hung out for the rest of the day.  I actually enjoyed just sitting on the couch and watching golf.  For like three minutes, I sat there and thoroughly enjoyed it.

    Then I decided to go make the potstickers early so they'd be ready whenever we wanted dinner.  I was in a great mood when I started making them.  After a while, though, I was like "is it me or is this taking forever?"  Turns out I had made 64 of them.  That's cool, so I guess I made enough for next time, too!  Today was awesome.

    I looked at a couple of different recipes for vegetable potstickers and just ended up winging it.  I crumbled up some firm tofu, then put some broccoli, carrots, bok choy, onions, and garlic in the food processor.  Mixed it all up with some ginger and an egg.  After that, same deal as usual.  But I did give them their own pretty plate this time.  They were really good, but I need to fiddle with the filling a little.  When I find the right configuration, I'll post it.


    I also made another rice salad tonight, Thai-inspired.  It was actually quite popular over here.  I think it could be its own entree if you're in the mood for a light meal.


    Tonight, Sophie's dinner was a quarter of a pear and some milk.  She had a small snack of pretzels after her nap, which she ate after she made them walk around and talk to each other for a while.  She didn't eat anything for lunch besides her leftover Cheerios from breakfast.  She did eat some French toast at breakfast along with her Cheerios.  I will not stress about this.  I will not stress about this.  I will not...

    Thai Rice Salad
    OK, this is my official recipe.  However, tonight instead of making the dressing below, I decided to finish off the cilantro-lime vinaigrette I made several days ago since I didn't know how long it would keep.

    2 cups sushi rice
    1/2 cup water
    3 tablespoons fish sauce
    Juice from 1 lime
    3 tablespoons brown sugar
    3 tablespoons minced lemongrass
    1 teaspoon crushed red pepper
    1 Asian pear, chopped (tonight I used one of the Bartlett pears that New Leaf had on sale last week)
    1 cucumber, chopped
    1 avocado, peeled, pitted, and chopped
    1/2 cup chopped peanuts, or more to taste
    1/4 cup chopped cilantro

    At least two hours before serving time, cook the rice and refrigerate.  Make the dressing by whisking together the water, fish sauce, lime juice, sugar, lemongrass, and pepper.  Mix the pear and cucumber into the rice and add 3/4 of the dressing.  Mix in the avocado, peanuts and cilantro, and finish with the remaining dressing.

    Makes about 4 servings.

    UPDATE: I think sushi rice may taste the best, but when I'm just making it for us on a weeknight, I usually use brown rice because it's healthier and works pretty well here.

    Thursday, April 7, 2011

    Homemade Mac 'n Cheese

    Last night we had some wonderful friends over for dinner. Sam and her two girls who happen to be the same ages as my girls! Both husbands weren't able to be home for dinner so we had a girl's night complete with talking about our periods, 80's music on Pandora, and lots of giggling little girlies. It was fantastic.

    I was 14 years old the first time I had macaroni and cheese from a box. I was staying with a friend and I loved it! My mother, chef du jour de la homemade food, was horrified. Since then I've elevated my tastes from Kraft to Annie's in a box but I'm back to realizing homemade is really the best.

    Lessons learned:

    - Food is always better when shared with friends.

    - Homemade macaroni and cheese is a crowd-pleaser (unless your crowd includes someone dairy-free, which our party did not last night)

    - A mix of american and sharp cheddar give the pasta slight twist.

    - Fruit salad is extra delicious with a little bit of cinnamon.

    - When I'm really hungry it's easy to forget to take a picture of the meal.

    The official menu:
    Homemade macaroni and cheese, broccoli, peas, fruit salad

    Mac 'n Cheese My Mom's Way

    1 box of elbow macaroni (last night = 1.5 boxes)
    1 lb of American cheese (last night = plus 1/2lb sharp cheddar cheese)
    Milk
    Butter

    Boil the elbow macaronies according to the box directions.

    Drain the noodles and pour them back into the big pot.

    Add some butter. (a couple tablespoons should be enough but it's all about personal taste)

    Add some milk. (a tablespoon at a time as needed)

    Break the cheese into small chunks. Add a few at a time stirring constantly.

    Continue adding milk and cheese until the consistency looks good to you.

    Eat. And if you're like me and my dad you'll want to add some pepper to your bowl.

    Monday, April 4, 2011

    Coconut Rice Noodles with Shrimp and Mango

    Menu: Coconut Rice Noodles with Shrimp and Mango; Sauteed Broccoli with Garlic and Soy Sauce

    Lessons learned:
    1. I don't usually saute broccoli, but I will be doing it often from now on.  Tonight's was perfect.
    2. Don't forget to shake the can of coconut milk before you open it!
    Last time I made this, I didn't even finish my portion.  The only thing I could taste was watered down noodles.  But tonight I gave it another shot, and I think everyone is glad I did.  Even Sophie ate a varied dinner: mangoes, "naked nuggets" (Quorn tenders), carrots, and broccoli.

    I was good and cooked the broccoli first.  I don't know why I never saute broccoli, but I gave it a try tonight with peanut oil over medium-high heat.  After the broccoli had cooked for two or three minutes, I added some minced garlic and a couple splashes of soy sauce.  I let it cook for another two or three minutes, then decided it needed about 1/3 cup of water.  As soon as that boiled off, they were still just slightly crunchy -- perfect.


    Coconut Rice Noodles with Shrimp and Mango

    8 ounces rice noodles, medium thickness
    1/2 pound shrimp, peeled (deveining is good, too... I forgot tonight and we didn't notice)
    More protein for kids, if needed
    2 tablespoons peanut oil, plus more as needed
    1 tablespoon minced pickled ginger
    4 garlic cloves, sliced
    1/2 cup chopped or shredded carrots, your preference
    3 tablespoons fish sauce
    1 tablespoon sugar
    3/4 cup coconut milk, or maybe a little more if you like
    1 mango, cubed
    Crushed red pepper to taste

    Break the noodles (wrapping them in a dishcloth is helpful) and cover them with hot tap water.  Let them soak for about 25 minutes, not much longer or they'll get waterlogged.  Meanwhile, heat the oil in a large frying pan over high heat.  Prep the shrimp as needed and add it to the pan, letting it cook without stirring too much.  (Note: I now add Quorn tenders to many meals with shrimp so my kids get some protein and I can still say it's from the same meal.  I also happened to have some egg whites in my fridge, and I decided to use it with some cornstarch to coat the shrimp.  I don't think this recipe needs the egg, but if it just happens to be convenient for you, it works well.)  Cook the shrimp until it's pink on both sides, then take them out and put them aside.

    Lower the heat under the pan to medium-high and add more oil if necessary (it probably is).  Add the ginger, garlic, and carrots and stir-fry them for about 30 seconds.  Then add the fish sauce and sugar and combine them evenly with the other items in the pan.  Add the noodles, which should still be just slightly stiff and starchy.  Pour the coconut milk over the noodles, then stir them continuously to ensure that they absorb the flavors in the pan evenly.  Add the shrimp back to the noodles and stir in the mango, too.  Sprinkle with red pepper and you're done!

    This serves two adults and two kids pretty well.  John and I both had small second servings, as we usually do.

    Fresh Pasta Ravioli with Ricotta Cheese Filling

    Menu: Fresh Ravioli with Ricotta Cheese Filling; Random Crunchy Salad with Mustard Vinaigrette and Rosemary

    Lessons learned (so many tonight):
    1. The first thing you need to do when making homemade pasta is pour yourself a glass of wine.
    2. The food processor doesn't make mixing the flour and egg any easier.
    3. Flour.  Flour.  Flour.  Flour.  Flour.  Flour.  Flour.  Flour.
    4. The pasta maker is not my friend.  Not yet, anyway.
    5. Roll the dough through the pasta maker in small batches.
    6. Flour, and flour some more.
    I love fresh pasta, and I love ravioli.  When I got married, one of the things I put on our registry was a pasta maker.  I also added a ravioli attachment that turns out not to work so well, which I found out after a blood-boiling seven-hour stint in my mother-in-law's kitchen one evening (finally served dinner at 10pm, very grumpy).

    Even without the ravioli attachment, my pasta maker is not what I would call user-friendly, but at least you can learn the pitfalls and get used to them.  Not that I have, but I'm trying.


    Tonight I got the idea to let my food processor do a lot of the kneading of dough.  It's no electric mixer, but it has a dough attachment, right?  Definitely not worth it, as it turns out.  I still had to do plenty of kneading, and just ended up getting a big dish dirty.  This is the first lesson I learned.

    After messing with my pasta maker for several minutes and learning that I needed to practically drench it with flour due to the consistency of the dough, I finally started rolling some sheets successfully.  That's when I realized that I should have opened the wine first thing.  I'd like to claim that my unkempt hair below is a result of my efforts in the kitchen, but I'm pretty sure it was looking that way all day.


    As I was making the sheets, I had problems with them getting too long for me to handle, or too sticky to make it through the thinnest, most hazardous, setting.  I learned to use pretty small clumps of dough -- like just big enough to fit in the palm of my hand -- and eventually I abandoned the last setting.  Next time if I have more patience I might try it again.  Here's what I finally ended up with:


    Wow, that's a lot of flour.  And you know what?  THEY STILL STUCK TOGETHER.  And to the paper underneath.  Rrrrrrrrrrgh!  OK, so next time I will dump a cup of flour onto the paper and definitely not let any of them touch each other.  You will also notice that they are not gorgeous.  After all the frustration with the pasta rolling, I decided I couldn't care less if they were pretty.

    Let me address the obvious question here.  Why make my own ravioli from scratch?  Is it really that much better than frozen ravioli, or especially the fancy fresh ravioli that you can buy in many stores?  I don't know if this would be true for other people, but my answer is yes.  The filling was so fresh and fantastic.  Not even in the same category as cheese ravioli from the freezer section; plus I got to use organic ricotta.  Also I love that you can flavor homemade pasta any way you want.  I just went with plain for tonight because I was so rusty on the prep, but in the past I've done spinach and lemon-pepper and they were yummy.  I would also love to do roasted red pepper and one full of Italian herbs.  The possibilities are endless.  And the more I do it, the easier it will be.  I'll get my method down.  And they really were yummy.


    I had to do a blind shopping trip this afternoon while we were out, so I ended up just throwing together an odd salad of lettuce, apples, carrots, radishes, and croutons.  I threw in some rosemary and dressed it with the last of my mustard vinaigrette.


    Fresh Pasta Ravioli with Ricotta Cheese Filling

    2 1/4 cups all-purposed flour, plus more as needed (I needed LOTS more)
    1 teaspoon salt
    3 eggs

    1 1/2 cups ricotta cheese
    1/4 cup grated hard Italian cheese, such as Parmigiano-Reggiano or Pecorino Romano
    1/4 teaspoon nutmeg
    2 cloves garlic, minced
    Salt and freshly ground pepper, to taste
    1 egg

    OK, so most recipes for fresh pasta that I've ever seen say to just pile your flour on the countertop or table and then make a "well" in the middle for your eggs, which you then start cutting in with a fork.  I much prefer to just use a bowl!  Put the flour, salt, and eggs in a small mixing bowl.  For me, it worked to keep my canister of flour open and next to me with a scoop at all times during this process; that way I could always dip my ball of dough right in it if needed, or sprinkle it over any of the surfaces I was using.  Once you're all set up there, just start kneading and keep going until the dough isn't sticky anymore.  When it's the right consistency, cover the bowl with a damp towel to prevent the dough from drying out as you work.

    Next make the filling, so it's ready to go when you need it.  Just mix the cheeses, seasonings, and egg together in a bowl and keep it next to your work area with a small spoon.

    I happen to have a pasta maker, so I'll give directions for that.  For ravioli, you could try using a rolling pin, but that's just not going to get the dough as thin as a pasta maker will, so be warned.

    Divide the dough into 8-10 pieces.  Each piece may seem small, but as you feed it through the pasta maker at each setting, it can get very long and hard to manage without tearing it.  Clamp the pasta maker to your counter or table, attach the feed tray, and turn the dial to the thickest setting (on my machine, that's number 1).  Feed your first piece of dough through each setting once or twice, trying to keep the sheets straight and even as they go through.  My dough was fine going through only once on each setting until I got to the thinnest one.  If you're going to use the thinnest setting, you probably need to feed the dough through the previous setting at least twice beforehand.  Mine tore and crimped each time I didn't do that.

    Now you need to decide what size you want your raviolis to be.  I ended up making larger ones.  In my opinion these are tastier because there's a larger amount of filling to be had in each one.  But they can look kind of shapeless and sloppy, too.  If you want the large ones, lay out one sheet of pasta horizontally (from your view) on a floured surface and spoon large globs of filling onto either the right or left side of the sheet, spaced out by about 1/2" - 3/4".  Then fold the other side over the filling side and press down around the globs to seal them in.  If you're worried that it won't stick, sprinkle or brush a little bit of water on the dough first.  If you want to make smaller ones, you can put smaller globs of filling all along the horizontal sheet on the half closest to you, then fold the far half over toward you and seal in the filling.  When you're done, cut the squares with a pizza cutter and arrange them on a floured tray.  Repeat until the dough and filling are all used.  You can get 20-25 large raviolis or maybe 35-40 smaller ones.

    Boil a large pot of water.  When the water is boiling, add the raviolis but make sure you don't overcrowd the pot; they're done when they float at the top.  It takes very little time, like less than 2 minutes.  It's easy to work in batches if you have a slotted spoon or similar tool to fish the raviolis out when they're done.

    Serve immediately with your favorite tomato sauce and some grated cheese.  And save some wine for when you're eating.

    Wednesday, March 30, 2011

    Ants on a Tree

    Menu: Ants on a Tree; Stir-Fried Green Beans; Sliced Apples

    Lessons learned:
    1. Easy on the heat while the noodles are cooking.
    2. Don't forget the ginger.
    3. Don't forget the bean sprouts!
    4. Don't forget the brown sugar!!
    I know.  "Ants on a tree" is not the most appetizing name for a recipe.  But it's really good if you can find the right balance of flavors, and I love it because it doesn't require pre-soaking the rice noodles.  Apparently, the name comes from the way the ground meat looks on the rice noodles in the original recipe.  I don't know who would want to be thinking about ants while they're eating, but the name stuck in our house.

    I've made this a lot so I don't use a recipe anymore, but it's been a while so unfortunately I forgot some things.  I forgot the ginger until the noodles were already soft.  I forgot the bean sprouts until after I had already garnished with cilantro (the picture below is pre-sprout).  And I forgot the brown sugar entirely.  It was still tasty, though, and hopefully I'll get back into practice.


    The original recipe calls for cooking the noodles in chicken broth, but I will often use vegetable broth, depending on what I have on hand.  I'm very partial to Wolfgang Puck's chicken broth, ran out of it a while ago, and it wasn't available at the last store where I was shopping.  What they did have was mushroom broth, which I thought could be good.  I went ahead and bought it to use here.  It was tasty, but I'm not sure I want to use it again because my protein is Quorn, which is made from fungus like mushrooms, and I don't want to overdo that element.

    I wanted to dress the green beans with Ginger-Hoisin Vinaigrette, but I ran out and didn't have it together enough to make more.  The rice noodles have a lot of soy sauce, so it wasn't my first choice to use it on the veggies as well, but it was the easiest and most reliably tasty thing I could think of to do.


    I'm so happy: this is the second meal in a row that Ben has eaten as is, the same way John and I eat it.  He loves flavored noodles!  AND he tried his green beans and liked them!  So he ate pretty much everything on his plate, plus seconds of the noodles.  Sophie only ate apples and the Quorn tenders from the noodles.  She asked for seconds on them, and I tried to tell her she could have seconds if she would taste a green bean.  In response, she freaked out.  I definitely think we will need to use that strategy soon, but I just don't think she's able to respond to it yet.

    This dinner would have been good with a beer, but I've had alcohol several nights in a row now, so I decided I'd give it a rest.

    Ants on a Tree

    Vegetable oil
    1/2 red onion, or more to taste, chopped
    4 large garlic cloves
    1 tablespoon of minced pickled ginger (I use the kind in a tube because I hate grating the real stuff)
    8 ounces ground pork or other crumbled protein (I also add Quorn tenders because they're easier for the kids to eat)
    1 teaspoon crushed red pepper, or more to taste
    1/4 cup soy sauce
    8 ounces rice noodles, medium thickness
    2 cups desired broth, plus more if needed
    1/4 cup rice vinegar
    5 ounces bean sprouts
    1 tablespoon brown sugar
    1 1/2 teaspoons sesame oil
    2 tablespoons cilantro, chopped

    Heat the oil at a medium setting in a large pan or 300 degree on an electric skillet.  Add the onion, garlic, ginger, protein, and pepper and saute until the onions are soft and the protein has browned.  Add the noodles, broth, soy sauce, and vinegar.  Increase the heat if necessary to bring the liquid to a simmer, and stir frequently to ensure that the noodles absorb the liquid evenly, adding more broth as needed.  When the noodles are pliant, mix in the bean sprouts and then add the sugar and sesame oil.  Garnish with cilantro just before serving.

    Serves up to 4 people.

    Linguine with Spicy Clam Sauce

    Menu: Linguine with Spicy Clam Sauce.  The end.

    Lesson learned: Tuesday night dinners are about to get a lot simpler.

    Tonight I went to a regular running group that meets at 6pm... right when I would normally be cooking and serving dinner.  It was a good workout, so I decided I'm going to go every Tuesday, even though that means I won't be at dinner.  I'll have to make something earlier in the day that doesn't need to be served hot, or that John can easily just heat up: I'm thinking maybe pizza, sushi...

    But this week, I already had plans to make my favorite homemade pasta dish, linguine with spicy clam sauce.  Just about everyone who has been a guest at my dinner table has been served this meal, and my husband and I have been known to eat the entire pound ourselves over the course of one night.  It's addicting to the point where putting leftovers in the fridge early is my only hope.  Anyway, John found out great news at work, so I wanted to make it even though we wouldn't be able to eat together.  What's even better is that Ben always loves it, so that means it's a dinner that 3/4 of us will eat!  There aren't very many of those these days.

    I had plans to make a salad, too, but I ran out of time before I had to get the kids out the door and to the track.  Even when I don't have somewhere to go during dinner, I've often found that my vegetable dishes get short shrift unless I make them first.  I need to work on sticking to that order.  I'm also planning on putting out a plate of crudites around 6pm, the time at which Sophie has started bugging me for food like clockwork every night.

    I was disappointed to see that I had run out of linguine, so I had to make it with farfalle tonight.  Somehow not as classy, but still yummy.


    Linguine (or other pasta) with Spicy Clam Sauce

    1 pound linguine
    2 tablespoons olive oil
    2 medium shallots or 1/2 red onion, chopped
    4-6 large garlic cloves, sliced
    1 teaspoon crushed red pepper, or more to taste (I keep it mild for the kids)
    1 cup half and half
    3 6.5-ounce cans chopped or minced clams with juice
    2-3 teaspoons dried Italian seasoning
    1-2 ounces fresh basil, chopped
    Parmigiano-Reggiano or Pecorino Romano cheese to taste

    Bring a large pot of water to a boil and add pasta; cook to al dente.

    Meanwhile, heat the olive oil in a medium saucepan over medium heat and add the onion, garlic, and pepper.  Saute until the onions soften and the garlic is turning golden, then add the half and half and the clam juice, leaving the clams aside.  Add the Italian seasoning and bring the sauce to a steady simmer over medium-high heat.  Let the sauce boil down by about half as the pasta cooks.  Combine the thickened sauce with the drained pasta and toss with the clams, basil, and a generous amount of grated cheese.  Wait a couple of minutes before serving to allow the sauce time to cling to and soak into the pasta.

    Makes 4 generous servings; could be stretched to 6 with other courses.

    Tuesday, March 29, 2011

    Quesadilla Bar

    Menu: Quesadillas; Mango and Guacamole Salad

    Lesson learned: Sometimes the kids just aren't going to eat dinner.

    At one point I thought tonight's dinner would be enchiladas with homemade green sauce.  But then I thought, why would I do something harder that no one will like more than quesadillas?  So quesadillas it was.

    Quesadillas were one of the first vegetarian dinners I worked into our normal routine.  We usually had them with chicken or steak, but you really don't need any meat; even my husband agrees.

    So here's what I put out: tortillas, shredded cheddar and jack cheeses, black beans, corn, chopped tomatoes, roasted red peppers, chopped mangoes, black olives, onions, cilantro, and sour cream.  John and I can each make what we want.  Sophie gets a cheese quesadilla, but I'll put whatever I think I can get away with in Ben's.  I also made John and I each a small mango and guacamole salad; the kids got mango pieces and guacamole.

    I don't know why, but the little ones just didn't eat tonight.  Sophie even left some of her mango, which is unheard of.  Ben did ask for lots of mango, and he ate all his guacamole.  Neither of them really ate their quesadillas, though, or even their tortilla chips?!  This is one of those nights where I really have to remind myself of one of my core principles: I am NOT stressing about what they eat for dinner.  As long as I put a healthy, balanced plate in front of them, I've done my job.  But sometimes I just wish there were even one thing that I could make and know that everyone would actually eat it.  If not quesadillas, then what?

    Sunday, March 27, 2011

    Pantry Day

    Attempted Menu: Homemade Spinach-Ricotta Ravioli with Tomato Sauce; Arugula Salad with Strawberries and Goat Cheese

    Actual Menu: Pasta with Tomatoes and Herbs; Garlic Bread; Arugula Salad with Strawberries

    Lesson learned: if I don't want to go to the grocery store, I probably don't have to.

    For whatever reason, I couldn't sleep last night.  I've been cranky, irritable, and lazy all day.  I had plans to go to the grocery store, but I could barely keep up with the things I had to do here at home.  So, dinner was improvised.

    I think many people try to minimize trips to the grocery store, especially in my situation.  I don't, for two reasons: (1) I'm always in need of places to take the kids, and (2) fresh produce.  The garden's in between seasons right now, so that second one is even more important.  So it happens I still had tomatoes and strawberries on my counter, plus the Italian herbs and arugula still in the garden.  It was good enough.

    We cooked a pound of pasta and did a little customizing.  John thinks that plain-as-plain pasta is a treat (don't ask me, I have no idea), so I put half of it aside.  In the other half, I mixed in olive oil and lots of bread crumbs with Italian herbs.  Then I took some out for the kids and put it on their plates with some marinara from a jar that probably only had a couple of weeks left at most.  For me, I mixed in the fresh tomatoes, fresh herbs, garlic, onions, and some Parmigiano-Reggiano.
    Sophie only ate strawberries and garlic bread.  Ben ate strawberries, pasta, and some bread.

    UPDATE: I was wrong about the kids' marinara being good for a couple more weeks.  When I went to put it away, I noticed a patch of mold on the inside rim of the jar.   So despite all my efforts to feed my family well, it turns out that sometimes I serve my children moldy food.  I guess there was more than one lesson I needed to learn last night.

    Thursday, March 24, 2011

    Barbecue Hawaiian Pizza

    Menu: Barbecue Hawaiian Pizza; Mango Salad with Guacamole

    Wish I could have learned some lessons tonight, but I don't think I did.  Pizza should be easy, right?  Well, it sure isn't in my kitchen.  Am I just trying to have my cake and eat it, too?  (And really, what could possibly be wrong with that?  Worst idiom ever.)

    The crust.  The crust is my problem.  I don't like any pre-formed crusts that I've tried so far, so I buy dough and roll it out.  Or rather, I knead it into a cookie sheet while swearing.  I do own a pizza stone.  I know that you have to let it preheat with the oven.  I know that you can sprinkle cornmeal on it to keep the dough from sticking.  But how to get the dough onto the stone?  Do I need a pizza peel?

    Despite the work, the pizza was good.  I like Publix's pizza dough, and tonight I used their 5-grain.  It's good, but it's even harder to knead out because the 5 grains tend to make holes in the dough.  For the sauce, I used a mixture of canned tomato sauce and tomato paste, then mixed in a little barbecue sauce (a little goes a long way).  After wrestling with the dough, I spread the sauce over it, sprinkled it with fresh oregano and onions, then layered shredded gouda and cheddar, roasted red peppers, pineapple chunks, shredded carrots, and ground white pepper.  I baked it at 450 degrees for 10 minutes and it was pretty much perfect (even if the picture isn't that pretty):
    The kids eat a little bit of pizza, but strangely they really aren't crazy about it in any form.  So I made this salad with leftover produce so Sophie could at least eat mangoes for dinner:

    Wednesday, March 23, 2011

    Italian Rice Salad

    Menu: Italian Rice Salad; Steamed Broccoli with Lemon and Basil Oil; Strawberry-Kiwi Salad

    Lessons learned:
    1. Ingredients are everything.
    2. Chocolate mint is my favorite mint.
    3. Choosing wines by their cutesy labels usually doesn't pay off, but sometimes it does!
    Italian rice salad has turned out to be one of my favorite weekday meals.  It requires very little cooking, is very hard to screw up, and it has some of my favorite flavors.  And since it goes so well with an Italian red, I just can't help opening a bottle!  Tonight I went with a 2009 Cabernet called Monogamy.  Let me just reprint what's on the back of the label:

    "You know you've experimented.  It's a way to discover what you like.  And what you don't.  What makes you happy.  What satisfies your soul.  It's how you know when you've found the one.  The one that makes you say, 'Sorry, I'm with Cabernet.'  When you've met the love of your life, is there really any reason to keep looking?"

    If I had read that when I bought it, I might have just put it back.  I mean, there is surely something romantic about a good glass of wine, but let's not get carried away.  Anyway, I think I got it because it was on sale at New Leaf Market.  But it's actually quite good!  I hope there's some left when I get back from the coffee shop tonight.

    Tonight, after many long days, my husband was home for dinner and we all ate together!  The kids ate some prosciutto, cheese, and broccoli, but mostly loaded up on this:
    OK, maybe my food photography leaves something to be desired.  I'm learning!  Anyway, those green flecks right there?  Chocolate mint.  Yeah.

    But back to the rice salad.  The key is ingredients.  For almost everything in this dish, there is a cheaper substitute you could use and it would really be fine.  Instead of Arborio rice, you could just use regular white or brown rice.  Instead of prosciutto, you could use bacon, ham, or salami.  You could leave out the pine nuts entirely.  Instead of fresh mozzarella, you could use regular.  If you don't have homegrown herbs and don't want to buy fresh ones, you could use Italian seasoning.  And it would still be a decent weeknight dish that covered the bases.  But it wouldn't be something that you really look forward to eating.  And I just need to mention that I tried the fresh mozzarella from Earth Fare for the first time tonight.  SO good.  Highly, highly recommend.

    I think the two most harmless substitutions would be the rice and the meat.  I'm not sure I really noticed the difference between Arborio rice and the white sushi rice we buy in a huge bag for a much better price.  Bacon instead of prosciutto would be different, but probably just about as good, since everyone in my house loves bacon.  Of course, then I'd have to cook it, and one of the things I love about this dish is that the only thing you need to cook is the rice.


    So here's the recipe.  I think just about any Italian salad dressing would work pretty well, but tonight I still had some basil oil leftover from last week's soup, so I emulsified it in red wine vinegar with salt, pepper, and garlic.

    Italian Rice Salad

    2 cups Arborio rice
    2-3 cups of fresh tomatoes
    3-4 ounces prosciutto
    6 ounces fresh mozzarella
    1/4 cup red wine vinegar
    1 large garlic clove
    Salt and pepper to taste
    1/4 cup olive oil
    1/4 cup fresh basil
    2 tablespoons fresh oregano

    1/4 cup pine nuts
    1/3 cup fresh grated hard Italian cheese, such as Parmiggiano-Reggiano

    Cook the rice using your preferred method, leaving time for the rice to cool before mixing the salad ingredients into it.  Chop the tomatoes, prosciutto, mozarella, and herbs into bite-sized pieces.  In a small bowl, mix the garlic, salt, and pepper into the red wine vinegar, then whisk in the olive oil to emulsify it.  Mix the tomatoes and prosciutto into the cooked rice, including as much of the tomato juice as you can preserve.  Next, gently mix in the mozzarella and toss everything with the dressing, herbs, and pine nuts.  Top it off with the grated Parmiggiano-Reggiano and enjoy.

    Makes 4 servings.

    Tuesday, March 22, 2011

    Susan's Cioppino

    Menu: Cioppino; Garlic Bread; Lemon-Garlic Green Beans

    Lessons learned:
    1. It's awesome when someone else cooks.
    2. I mean, it's really, really awesome when someone else cooks!
    Cioppino ("chip-EE-no") is my husband's favorite home-cooked dish.  His mom made it for dinner right before she went into labor with him, and it's still one of her signature dishes 30 years later.  He's been putting in a lot of time at work, so she decided he deserved to have some when he got home tonight.  Woohoo!  It was delicious, especially because I didn't cook it!  And it requires wine, so since the wine was already open, my father-in-law and I finished off one of his favorites, a Monte Antico Sangiovese blend.

    Sophie ate only garlic bread.  Ben, however, couldn't get enough of the fish from the soup!  He probably ate 2/3 of what was in my first bowl, then had seconds.

    My mother-in-law says I can share her recipe, so here it is!

    Susan's Cioppino

    1/2 large green bell pepper
    2 tablespoons onion, chopped
    1-2 cloves minced garlic
    2 tablespoons olive oil
    14.5 ounces canned diced tomatoes, with juice
    8 ounces canned tomato sauce
    1/2 cup dry red wine
    3 tablespoons chopped fresh parsley
    1/2 teaspoon salt
    1/2 teaspoon Italian seasoning
    Fresh ground pepper to taste
    1/2 pound white fish, chopped
    1/2 pound sea scallops, chopped
    1/2 pound uncooked, peeled, deveined shrimp
    6.5 ounces minced clams, with juice

    Saute the green pepper, onion, and garlic with oil in a large pot over medium heat.  Add the tomatoes, sauce, wine, and seasonings.  Bring the soup to a boil, then lower to a simmer for about 20 minutes.  Add the fish, scallops, shrimp, and clams.  Return the soup to a boil briefly, then take it off the heat and serve with crusty garlic bread.

    Makes about 4 main course servings.