Showing posts with label vegetarian. Show all posts

Monday, June 20, 2011

Fathers' Day French Toast

One of the great things about French toast is that you can make it with just a few ingredients that are almost always on hand: bread (even stale), milk, and eggs.  My husband loves a hot breakfast, so he is usually the one to treat us to French toast in the morning.  When he wants to make it special, he might add some cinnamon and vanilla.

This Fathers' Day, I decided to make three significant improvements over our normal weekend fare:

  1. I bought some challah bread and sliced it myself.  When you compare a thick slice of egg bread French toast to the sliced whole-grain sandwich bread variety we usually have, it hardly seems fair to call them by the same name.
  2. I gave our maple syrup a makeover by boiling it for two minutes with a tablespoon of butter and two teaspoons of cinnamon (for one cup of syrup).  Wow.
  3. The night before, I sliced up some peaches and let them sit in a bowl with brown sugar and orange juice until they became French toast topping in the morning.
I can't take credit for any of these ideas, unfortunately.  Check out my sources at Epicurious.

Friday, June 17, 2011

Banana Bread Muffins


Well, it finally happened.  Two of our bananas turned brown.  Usually, bananas are the reason I go to the grocery store.  Both kids often want multiple bananas for breakfast (although they only get one each), and if either John or I have one, they're gone in two days.  I don't know what happened this time, but I was thrilled to see those brown speckled bananas.  It meant I could make my famous coconut-banana bread, and then blog about it.

Or... not.  Because you see, a loaf of banana bread takes an hour to cook.  And wouldn't you know it, I found myself out of coconut.  So I looked up a banana bread recipe in my America's Test Kitchen cookbook, mixed up some ingredients, and poured the results into a muffin pan.  We were eating them 25 minutes later.

My favorite part of banana bread is not actually the cakey interior.  The best part of banana bread to me is the crust, specifically the top of the crust where it splits as it rises, and what results is twin peaks of sweet brown crust that surround a small valley of gooey, sticky banana deliciousness.  Am I alone in this?  It doesn't matter.  All I know is that yesterday, I made twelve of those.  Best idea I've had all week.

Someday soon I will make my famous coconut banana bread and blog about it, because these recipes actually yield somewhat different textures.  My usual recipe is pretty cakey, whereas this one was a little lighter and airier.  Perfect for a muffin, if you ask me.

Banana Bread Muffins, adapted from The New Best Recipe from America's Test Kitchen

1 stick of unsalted butter, softened
3/4 cup sugar
2 large eggs
1/4 cup plain yogurt
2 (or 3, if you've got them) very ripe bananas
1 teaspoon vanilla extract
2 cups all purpose flour
3/4 teaspoon baking soda
1/2 teaspoon salt

Let me say at the outset that I'm the kind of cook that uses only one bowl when I bake.  I'm not washing two mixing bowls just so I can sift out the dry ingredients.  I hope you're still willing to read my blog despite that confession.

Preheat the oven to 350 degrees.  Combine the butter, sugar, eggs, yogurt, bananas, and vanilla extract in a medium mixing bowl.  You'll want to use a potato masher, or something similar, for the bananas.  I like some bigger chunks of banana in my bread, so I don't spend too much time mashing.  After the first set of ingredients is well blended, add the flour, baking soda, and salt, and stir just until the dry flour is gone.  Spoon the mixture evenly into the greased cups of a muffin pan and bake for 20 minutes.  Yum.

Jamaican Jerk Sauce

Menu: Barbadian Chicken with Jamaican Jerk Sauce; Moroccan Toasted Couscous with Fruit; Seared Zucchini


Lessons learned:

  1. My kids won't even try plums or apricots.  That totally bummed me out.
  2. I think I just need to admit that I'm not a couscous person.  That should be fine, since it's not a whole grain anyway.
  3. This chicken would be much better unbreaded and grilled.  The sauce is great.
It often happens that I end up making multiple recipes for the first time on the same night.  I guess I'm just taking advantage of the fact that I have time to do that these days, because very soon that will not be true.  So tonight I tried two, or two-and-a-half, recipes from The Whole Foods Market Cookbook, which I recently borrowed from a friend (thanks, Heather!).

I was really excited to try this Barbadian Chicken and accompanying Jerk Sauce (I'm choosing to refrain from any bad "jerk" humor; you're welcome).  Once again, as soon as the kids found out we were having chicken, that's all they could talk about.  I spent most of my cooking time deflecting urgent pleas for "some sicken."  Here's how it turned out:


To be honest, I was kind of disappointed because I don't cook meat very often, and this was just so-so.  I mean, it was... fine.  But there are so many things I could have done with this that would have turned out much better; at least I think so.  I guess if you really love breading on chicken, this was a healthy way to get it.  But these chicken tenders would have been much tastier just pan-fried, grilled, or even broiled, because the jerk sauce marinade was quite good and worked very well as a dipping sauce, too.  The breading was just unnecessary.

The couscous was one of those recipes that sounds really good to me, but the flavors somehow just don't combine into something I'm excited about eating.  The basic idea was to toast some Israeli couscous in the oven, then cook it with boiling water and turmeric (that's what gives it that golden color).  Toss in some apricots and plums (the original recipe called for dried fruit, but it's summertime!) and chopped pistachios, then dress it with a really fun-sounding citrus dressing made with delicious flavors like cardamom, cinnamon, and honey.  What can I say?  It just didn't work for me (or anyone else here).  But it looks kind of pretty:


I'm really interested in doing more with yogurt.  I thought it combined really well with the jerk sauce.  A few weeks ago, I tried making some fried green tomatoes and decided they needed a dip, so I combined some peach yogurt and Worcestershire sauce.  It doesn't sound good, but it was!  I need to keep some plain yogurt around and do more experiments like that.  For now, here's the recipe for the sauce.

Jamaican Jerk Sauce, adapted from The Whole Foods Market Cookbook

1 jalapeno pepper, halved and seeded
4 scallions, or a handful of chives
3 garlic cloves, peeled
A 2" piece of fresh peeled ginger
About 4 sprigs of fresh thyme
2 teaspoons dried allspice
Juice from 2 limes
1/2 cup ketchup
1/2 cup pineapple juice

Put everything in the food processor and press go.

This makes about 2 cups; combine it with plain yogurt to make it a dip.

Tuesday, June 14, 2011

Stir-Fried Corn and Broccoli

Menu: Broiled Tilapia; Sweet Potato Crinkle Fries; Stir-Fried Corn and Broccoli; Watermelon


Lessons learned:

  1. The Alexia sweet potato crinkle fries are pretty delicious.  Not cheap.  But delicious.
  2. Two ears of corn to one regular broccoli stalk would be a good ratio; I wasn't sure so I used three.

Stir-Fried Corn and Broccoli, adapted from Asian Flavors of Jean-Georges

Vegetable oil
Fresh sweet corn cut from 2 ears
1 stalk of broccoli, cut into small florets
1 jalapeno pepper, seeded and minced (if you like heat, you could use a spicier pepper, which is what the original recipe called for)
1 large garlic clove, minced
About 2 teaspoons of pickled lemongrass from those squeeze tubes in the produce section
Soy sauce

Heat a skillet over high heat.  Add a small amount of oil to coat the bottom of the pan.  When it's smoking, add the corn, broccoli, and pepper.  Leave it still for about a minute so it has a chance to brown, then toss it with a spatula and leave it to brown for about another minute.  Add the garlic and lemongrass and mix it in evenly.  Add 1/4 cup of water to the pan to cook the broccoli  a bit more, stirring the mixture constantly now.  When the water has cooked off, take the broccoli off the heat and sprinkle on soy sauce to taste.  If the broccoli isn't cooked enough for your taste, you can cover your pan for about a minute to steam it some more.

This makes enough for two adults plus two kids who don't eat much of it.  I'd double it if I were serving four adults.

Sunday, June 12, 2011

Pasta ai Quattro Formaggi, Take One

Menu: Mac 'n Cheese Italian-Style; Fridge-Digger salad; Grapes


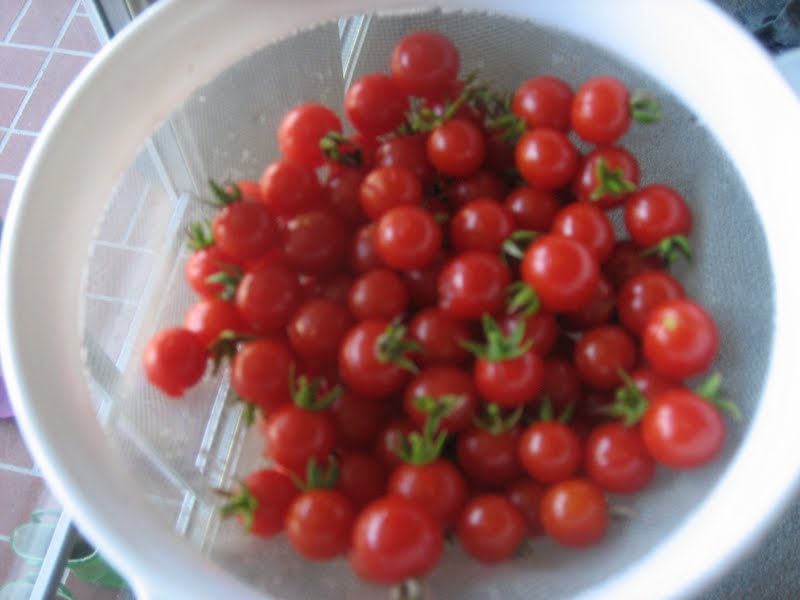
Going out back today, I discovered there were a whole mess of these:


So I grabbed them before anything else could.  I have more tomatoes than I can use.  Several bigger varieties are rotting on the vine.  I cannot tell you how sad that makes me.

I originally thought I might make two 8x8" pans of this dish and freeze one for another night, since these days I'm not home at dinner time on Tuesday or Thursday nights.  (That's a conundrum to discuss another time.)  But when I looked over the recipe, I realized that's it's actually not that kind of casserole.  Because of the need to preserve the integrity and flavor of the cheese, it seems like you pretty much have to bake it right after you've assembled it.  So I figured I would just score some (hopefully) delicious leftovers for lunch this week.

I have not had good luck with homemade mac 'n cheese in the past.  It's ALWAYS too milky.  But here's what came out of my oven tonight:


If anything, there wasn't enough sauce here, but actually I think it was almost perfect!  The focus is pretty much all on the cheese: fontina, gorgonzola, and pecorino romano (the recipe called for parmesan, too, but I didn't feel like buying it when I already had plenty of romano).  And the texture was everything I wanted it to be: crispy noodles on top, gooey cheesy pockets throughout.

However, I'm not going to post the recipe just yet because there are still some kinks I need to work out.  For starters, the original called for heavy cream and it really seems like you could get away with half and half here.    Also, it was a bit too salty, so next time I'm going to try it without adding any salt and using homemade bread crumbs instead of the packaged Italian ones I happened to have on hand.  Finally, the writers included a variation where you add tomatoes and I'm pretty sure I won't be able to resist trying that.

But if you're interested in this version, the basic idea is: cook some pasta until it's very al dente.  Meanwhile, make a bechamel sauce with a tablespoon each of butter and flour, then 1 1/2 cups of cream.  Put the drained pasta into a bowl, then put /14 cup each of fontina and gorgonzola on top, plus about 3/4 cup of romano.  Add some fresh Italian herbs if you've got 'em.  Pour the bechamel over everything, then cover it immediately with a lid of some sort to keep the heat in for a couple of minutes.  Stir it all up, then bake for 7 minutes at 500 degrees.

Anyway, all I knew going into dinnertime tonight was that I was, at long last, going to make the Italian version of mac 'n cheese that I discovered in my America's Test Kitchen cookbook.  No plans for vegetables.  I'm testing my hypothesis that if I just make a habit of grabbing the good-looking veggies and fruit when I go shopping and combine those with whatever I may have in the garden, I can pretty much ad-lib the veggies when it gets to be dinner time.  In my fridge, I found some spring mix on its last legs and some iceberg lettuce with barely one leg left.  Mixed it up with the little darlings you see above, some carrot slices, some homemade croutons (otherwise known as toast), and a nice red wine vinaigrette.  We ate it all.

Tuesday, June 7, 2011

Broiled Tomatoes with Pesto and Mozzarella

Menu: Farfalle with Black Pepper and Cheese; Broiled Tomatoes with Pesto and Mozzarella; Cucumber Grape Salad with Herbed Croutons


Lessons learned:
  1. This might be one of the few occasions in which fresh mozzarella isn't ideal.
  2. My son likes cucumbers!

Dear fresh tomatoes of summer,

My love for you is deep and true.  I adore you straight from the vine, chopped in a salad, sliced on sandwiches, tossed with pasta, blended into a smooth fresh sauce.  Whether you're paired with cheese, dressed with oil and vinegar, seasoned with soy, or wearing nothing at all, you are divine.  I would eat you smothered in pesto:


And topped with fresh mozzarella:


Sadly, my family doesn't understand my passion for you.  My daughter wants nothing to do with you, and my husband and son will only tolerate cooked tomatoes.  So tonight, you go under the broiler.  It's the only way we can be together.


Je t'aime.

Friday, May 20, 2011

Golden Roasted Potatoes

I'm having camera issues over here, so I can photograph neither my food nor my son rocking various pairs of Mama's heels.

Yesterday we made our second trip to the Thursday afternoon organic farmers' market.  If you haven't been over there, I definitely encourage it.  They're really trying to grow (not to mention keep the farmers they have), and can only do that if there's traffic.  It's in the shade, too!  Yesterday we got free samples of chocolate goat milk ice cream (which Ben enthusiastically deemed "nummy") and black-eyed pea bread (THAT is why I love farmers' markets; there's always something I've never heard of).  I bought some green beans, blackberries, red leaf lettuce, and some beautiful big new potatoes.  The guy told me I had to make them that night to really capture their flavor, and I said no problem.

So here is my favorite potato recipe, which I made last night.  It's good anytime from breakfast to dinner, and it works anywhere from a barbecue to a baby shower.  And it's super simple.  Normally I use Yukon Golds, but I used the new potatoes last night and they were delicious, too.  Since the potatoes are only flavored with butter, oil, salt, and pepper, the key is to go for it on all four; take the following measurements as minimums.  Don't try to make this healthier than it should be!

Golden Roasted Potatoes, adapted from Gourmet magazine

1.5 pounds potatoes, Yukon Gold are best
2 tablespoons melted butter
2-3 tablespoons olive oil
Salt to taste (I like to use Kosher), at least 1/2 teaspoon
Fresh ground pepper to taste
Garlic powder (optional)

Preheat the oven to 350.  The original recipe says to peel the potatoes, but I see no reason to as long as you clean them thoroughly.  Slice them as thin as you can, within reason.  I mean, don't spend 5 seconds per slice or anything.  Someday I'll get myself a mandoline, but until then I can get my slices pretty thin by hand.  Just do your best.

Put the slices in a mixing bowl and combine them with the butter, oil, salt, and pepper.  Stir them around for as long as it takes to really get each slice coated with fat and seasoning, maybe a minute or so.  Spread them out in a pan; for this amount you could use either 8x8" or 9x13".  I like the larger one since my favorite potatoes are the ones that get brown, and the bigger pan means there are more of those.  If you want, you can sprinkle some garlic powder across the top of the potatoes here, too.  Cover them and bake for 20 minutes, then increase the oven temperature to 450 and take the cover off.  Bake for about another 20-30 minutes, or until the top looks brown enough to you.

Serves 4.

Tuesday, May 17, 2011

Fast and Loose with Substitutions (Gingered Snow Peas)

Menu: Black Pepper Shrimp with "Sun-Dried" Pineapple; Snow Peas with Ginger Butter

Lessons learned:
  1. Oven-drying fruit: I can't WAIT to buy my next pineapple!
  2. Mashed black beans in stir-fries: surprisingly tasty.
  3. Ginger fried in butter: unsurprisingly tasty.

I almost never make a recipe as written, even if it's my first time.  I make changes according to what I happen to have on hand, what shortcuts might be possible, and what has worked for me in the past.  This approach isn't for everyone, obviously, but sometimes it ends up going too far even for me.

Last night, I endeavored to prepare a fantastic-looking recipe from a great cookbook I found recently at the library, Asian Flavors of Jean-Georges (Vongerichten).  My thought process as I scanned the ingredient list before shopping was, unfortunately, as follows:

"Pineapple?  Those are $5 each.  I already have some mangoes.  Vegetable oil?  Check.  Scallions?  John doesn't like onions, so I'll just cut some chives from the garden and sprinkle them on my portion.  Ginger?  Check.  Garlic?  Check.  Black peppercorns?  Check.  Fermented black beans?  Ummmmm... I have regular black beans.  I'll just use those.  Kecap manis (sweet soy sauce)?  Huh?  I'll just use half soy sauce and half rice vinegar or something like that.  Regular soy sauce?  Check?  Lime juice?  Check.  Sugar and salt?  Check.  Shrimp?  Check.  Jicama?  I've always wanted to try one of those!  [Later at the store: 'gross, the two jicamas they have are both moldy!  I have some carrots at home.']  Baby pea shoots?  I'm going to pretend I didn't see that."

As you might expect, what I ended up with was very different than the beautiful picture in the book.  It was definitely edible, but next time I think I'll make a real attempt to cook the recipe as directed (probably still minus pea shoots, though).

The most interesting thing about this recipe is the oven-dried pineapple.  The intro says it is "amazing," so I decided I would try it with the mango.  It really was good: all that sweet flavor without the messy juice.  I think it really will be fantastic with pineapple.  I can't wait!

I also tried another recipe for preparing my snow peas.  This is one of those really simple ones that I don't know why I couldn't have come up with myself.  Melt some butter in a frying pan, then throw in about a tablespoon of fresh chopped ginger and wait for it to brown a little bit.  It tastes like candy!  Toss your veggies in it, then grate some lemon zest over that and sprinkle with a little salt.  Very nice.

Pesto Potato Salad

Menu: Pesto Potato Salad; Broiled Tilapia; Garlic Bread

Lessons learned:
  1. Putting some parsley in your pesto really helps to keep it looking bright green.  When my pesto darkens, I cry a little inside.
  2. Don't forget to leave some salad components unpestoed for the kids.  Ben liked pesto last year, but since then I think he has learned that green things are yucky, so he wouldn't try any of this.
 I LOVE this salad.  I discovered it last year in my Moosewood Restaurant Cooks at Home cookbook.  Their version includes hard-boiled eggs, but that goes a little overboard to me, so instead I just use a lot more fresh mozzarella than they call for.  I also use a different pesto recipe (from Williams-Sonoma's Sauces cookbook), since it's a perfect balance and I don't want to mess with that.

Unfortunately, I'm the only one in my house who gets excited about fresh tomatoes, mozzarella, and pesto.  But you know what, people?  That's what summer is about for me.  I know fresh corn is the standard crop for the season, and a grilled cob with a compound butter is hard to beat.  Except if you're me and you have fresh tomatoes and basil growing right in your back yard.  I waited for this all winter.

Tilapia has been a big hit lately.  I've got the prep down and it's super easy: I put an oven rack as high as it'll go and preheat the broiler on high.  I grease my grill pan and lay the fillets on it, then sprinkle them liberally with salt, white pepper, garlic, powdered lemon peel, and paprika.  Stick them right under the broiler for 5 or 6 minutes and they're ready to go.  I know they would be fabulous with some sort of remoulade or a drizzle of something... not that they need it!  These days I'm trying to find ways to make less effort, not more.  There's probably something I could buy if I got down off my high horse about prepared foods...

Pesto Pasta Salad


4 medium potatoes (Yukon Gold is usually what I have), cut into bite-sized pieces
1/2 pound green beans, trimmed and cut into 1" pieces
About a pint of cherry or plum tomatoes, halved
About 6 ounces of good fresh mozzarella (I like the little balls), halved

For the pesto:
2 ounces pecorino romano chese
1/4 cup pine nuts
2-3 cloves garlic
2 cups packed fresh herbs: mostly basil, but about 3 tablespoons parsley for color
1/2 cup olive oil
1/4 teaspoon salt
1/4 teaspoon fresh ground pepper

Boil a medium pot of water and add the potatoes.  Cook them just until they're easily pierced with a fork, maybe about 7 minutes?  I forgot to time it, and the recipe doesn't say.  Remove the potatoes from the water with a strainer, but keep your water boiling for the green beans.  Boil the green beans for about 3-4 minutes so that they're cooked but still have a little crunch to them.  Let the potatoes and green beans cool off, maybe in the fridge if you're pressed for time.

Put the cheese, pine nuts, garlic, and herbs into the small bowl of a food processor and turn it on.  Slowly pour the oil in through the feed in the lid as the machine runs.  Let it go until the mixture has a sauce-like consistency; no big chunks.  Pause every now and then to push down anything sticking to the sides of the bowl.

Toss immediately with the potatoes, green beans, and tomatoes.  Add the delicate cheese at the end and toss again gently.  Done!

Thursday, May 5, 2011

Eat A Rainbow

I've been really obsessed with meal planning lately. I've always made a weekly ishish meal plan...written down a few ideas for meals that week and semi-made-sure we had the ingredients on hand.

But now I've realized that if I spend an hour each week I can come up with a plan for breakfast lunch and dinner and a very specific shopping list. The first few weeks I was very intentional about eating exactly what my chart said for each meal. It was working but then life started butting in and I couldn't totally predict our days so I let it get a little looser and I think I've got it working for my family.

A few tips on the way I do it:

- find a good planner. Some people may like an app on their phone. Others may prefer an Excel document. I have to hand-write it and put it on the fridge where I can scratch out and easily see what's going on. I've tried it a couple ways and am currently using the form found here.

- Plan at least one meal that can be moved to the next week without any ingredients spoiling.

- Also make a notation to cook extra of something one night to freeze for later.

- Build in one night to use something from your freezer so you don't put a bunch of stuff in there and then never use it because you are waiting for the perfect day to need it...my personal issue... Plus you'll love not having to actually cook one night.

- Planning breakfasts and lunches puts so much time back in your day. No wandering around the kitchen eyeing the cabinets and asking everyone what they want.

- Plan meals with your calendar of events open next to you. So you don't plan to make a brand-new 3-hour recipe on the day your kid has soccer practice and a dentist appointment and you're taking the car in for an oil change.


Meal planning allows me to see at a glance how my family has eaten that week. I even make a list of snacks we have for that week so we don't eat Goldfish or Bunny Crackers twice a day for 7 days.

One of my main food goals is to make sure we all eat as many naturally colored foods as possible each week. Some days we don't eat anything green (gasp!) but we make up for it another day with zucchini muffins for breakfast, peas for lunch and broccoli for dinner...and meal planning helps me make sure that happens.

Occasionally though we do get all the colors in one meal...

Eat A Rainbow for Dinner

Purple Potatoes!!!


A great addition to a rainbow meal. The texture and taste is a good cross between a regular white potato and an orange sweet potato.

Becki and I were discussing how to make rainbow meals a few weeks ago and previously the only purple item I could come up with were purple Goldfish. This picture is from a lunch Zola and I created in February:


But a couple weeks ago I hosted a potato bar night for us and Grant's parents and when we were putting everything on our plates I realized I had accidentally prepared a great rainbow meal for us!
Here's mine:


I like to make separate little piles so can taste everything individually and then mix as I go.

and another version made by Grant:


He's a pile it all together because it's just going the same place kind of eater.

and Zola insisted I take a picture of her dinner too which conveniently added in the blue that was missing from mine and Grant's plates.


Here's the Roy G. Biv from our dinner:

Red: tomatoes in the salsa
Orange: Sweet potato, cheese
Yellow: cheese
Green: homemade guacamole (avocado, lime juice), cilantro
Blue: blue corn chips with flax seed
Violet: purple potatoes!!!

extras: black beans, white potatoes, sauteed onions

Monday, May 2, 2011

Avocado-Tomatillo Salsa

I have to admit that in the last year or so, I've become enamored of chunky guacamole.  But before that, when I bought avocados I almost always made them into this smooth salsa that I found on the Williams-Sonoma website several years ago.  It works as a dip, but also as a spread.  I made it for a Mexican buffet on Friday night... as good as ever!


Avocado-Tomatillo Salsa

1 Serrano chile, seeded
1 large garlic clove
2 large tomatillos, husks removed, skins washed, quartered
1 ripe avocado, peeled and pitted
2 tablespoons lime juice
Big pinch of cilantro
Salt and pepper to taste

Combine all the ingredients in a food processor and blend until smooth.

Makes about 2 cups.

Thursday, April 28, 2011

Tropical Rice Salad

It might appear to some that I'm obsessed with rice salads.  I don't think it's anything clinical, but I do seem to make them a lot.  They're basically just a cold version of the fried rice I used to make all the time.  Some people really don't like cold food; I am obviously not one of them.  In many cases -- fruits and vegetables, meat and seafood, breads and other baked goods -- I'd rather have things just barely cooked, if not raw.

Anyway, about that rice salad.  This is another one inspired by Mark Bittman's How to Cook Everything Vegetarian.  After seeing a whole bunch of other vegetarian cookbooks yesterday at the library, I'm even more aware of what a wonderful collection he came up with.  I think the fact that he's not vegetarian himself may be part of why I like it so much; we have similar taste preferences.

He suggests combining tropical fruit -- pineapples and mango -- with macadamia nuts.  I spent a long time not liking nuts at all, so I had actually never had those.  I thought I might try cashews in this dish, but I decided that even at $17/pound, my weekly budget would allow me to buy just a few macadamias and give them a try tonight.  I tasted one before I ground them up to put in the salad, and seriously thought twice about putting them in.  They tasted like peanuts, only harder and nuttier.  But I went ahead anyway.  What an amazing effect they have in combination with sweetness!  I guess that's why you see them so often in desserts.

Another surprise was the brown rice.  In my cooking, brown rice tends to be just a healthier substitute for the starchier kinds that everyone likes better.  But this time, the brown rice combined with the chopped macadamias and some coconut to create a really nice nutty complement to the extra-sweet tropical fruits.  (By the way, I also bought a papaya to add.  Definitely not worth it... the pineapple and mango were more than enough.)

I wish I had added a little cilantro or, as MB suggested, mint, but I didn't think of it and I'm sure the rest of my family is quite happy that I didn't.  Oh well.

As I mentioned in the previous post, I made enough for at least four people, so there is a lot of this left over and rice unfortunately does not save well... unless you're planning to stir-fry it!  I can't wait.

Tropical Rice Salad

2 cups brown rice
1/4 fresh pineapple, peeled, cored, and sliced
1 mango, peeled, cored, and cubed
1/4 cup chopped macadamia nuts
1/4 shredded coconut
1/3 cup dressing of your choice (I used champagne citrus vinaigrette)

Cook the rice well before serving time, and let it cool.  Mix in the rest of the ingredients, and enjoy.

Friday, April 22, 2011

Corn Fritters

Menu: Thai-Style Corn Fritters; Hash Browns; Asparagus with Mustard Dressing

Lessons learned:
  1. Unless I want to eat the entire bushel of asparagus myself, I shouldn't bother buying it.
  2. Hash browns may not be the most sophisticated thing to do with potatoes, but when Sophie will actually eat some of them, not much else matters to me.
This post is a couple of days late because yesterday I got hit with a 24-hour bug (yes, sick AGAIN) and felt nauseous even thinking about food.  John made his specialty again, and by that time I was feeling well enough to have some.  Fantastic.

The night before was my last planned dinner before my next shopping trip, and those can always be a little dicey since I may not have always saved everything I needed for it.  In this case I had a different problem: there were some potatoes on the verge in my refrigerator.  A few days before I had thrown them in there hoping to keep them going for a few more days, but I figured I'd probably reached the limit and it was now or never.  So although I think these corn fritters would have been matched better by a cool tropical rice salad, my kids got to eat some plain ol' hash browns (and ketchup of course) for once.

By the way, I pretty much only buy Yukon Gold potatoes.  They have a built-in buttery taste and what I consider to be a very satisfying texture.  I may buy red potatoes if I'm doing a cold salad, just to change it up.  But when I say "potatoes," I'm only talking about one kind.

I discovered these corn fritters in HTCEV when I decided I wasn't cooking with meat anymore and kind of panicking because of how few vegetarian dishes I knew and liked (let alone how few my family would like) at that point.  Can I just say again how thankful I am for this cookbook?  I think I paid $25 for it.  It was too little.


Basically, you bind corn together with egg and flour and fry it up.  The best thing about these is how creative you can get with them, though.  His version is "thai-style" because it has some hot chiles, soy sauce, and is fried in peanut oil, and I used that combination plus some cilantro.  But when the tomatoes and peppers come out in my garden, I like to throw those in, too, and you can leave out the soy sauce, draw from more traditionally Mexican flavors -- maybe even throw in some black beans! and some cheddar! -- and serve them with sour cream.  These are some versatile little doodads, is what I'm saying, especially with a dipping sauce.

A dipping sauce is another thing I was missing this time.  Sigh.  I still am not good with the dipping sauces.  I've got to get on that!

Here is the asparagus that no one but me ate.  John said he had "some."  I think he ate one stalk.  I broiled them in the oven for about 8 minutes, mixed up a champagne citrus vinaigrette I had with some mustard, and drizzled that over the stalks when they came out.  What a waste!


Fortunately, I had my Corona to take my mind off of that.


Corn Fritters, Thai-Style (adapted from Mark Bittman's HTCEV)


2 eggs
Salt and fresh ground black pepper
1/2 cup chopped scallion (I grabbed about 1/4 cup chives from my garden)
1 teaspoon minced fresh chile, or hot red pepper flakes to taste
2 cups corn (soon I hope to be able to get the corn right from the cobs)
1 tablespoon soy sauce
1/4 cup all-purpose flour
3-4 tablespoons peanut oil

Separate the 2 eggs, letting the whites fall into a small mixing bowl and putting the yolks into a larger bowl.  Add all the remaining ingredients except the oil to the yolks and mix well.  Start heating the oil in a skillet over medium heat -- you don't want the outsides to cook too fast.

Beat the egg whites until they're stiff.  Gently fold them into the corn mixture, just until they are mixed in evenly.  Spoon dollops into the heated pan in the size you prefer and cook until nicely browned on one side, 3-5 minutes, then brown the other side.  These taste best hot, so serve them right away.

This recipe is supposed to contain 4 servings, but that seems awfully stingy.  For four adults, I'd increase by 50%, especially if this is intended to be more than just a side.  However, I think they could make good appetizers, too.

Monday, April 11, 2011

Italian Quiche

I LOVE quiche. The first time I remember eating quiche was at Chez Pierre in Tallahassee about 10 years ago. I was invited to lunch for a friend's birthday and being a poor college-aged person I ordered the cheapest thing on the menu. Broccoli and Cheese Quiche. It was pure culinary delight at first bite. The silly thing that happened next was that it was years (YEARS!) before I ate it again...and then I had to learn to make it myself.

At first I was totally intimidated...how could I make something that could ever compare to that first taste!? Turns out it's pretty easy...

Lessons Learned:
- I don't think there's anything I wouldn't eat in a pie crust smothered with eggs and cheese.

- Double check the recipe BEFORE you make a pie crust... even an easy one.

Official menu: Italian Quiche, green salad with craisins and sunflower seeds in Italian dressing, cantaloupe


Italian Quiche

1 easy pie crust:
1.5 cups of flour (I used white flour this time but I want to try it with whole wheat)
3 tablespoons olive oil
1 teaspoon salt
2 teaspoons white sugar
3 tablespoons milk

- mix with a fork in a 9x13 baking dish. press into bottom and slightly up sides.

Saute or boil or steam your choice of chopped veggies.
For this one I used:
1 zucchini
1 onion
1 green pepper
1 yellow pepper

- spread the veggies over the crust.

In a mixing bowl whisk together:
8 eggs
Milk (a couple tablespoonsish)
Sage
Salt and Pepper
Garlic
Basil
(this is just what I used for our Italian version...but I mix it up according to the taste I'm going for)

- pour over the veggies.

Top with grated cheese. I used mozzarella and asiago.

Bake at 350 until it is browning on top.

Kid Note:
Zola (age 3) wouldn't even try it...weird. But she ate handfuls of sunflower seeds and craisins. She also ate a bunch of cantaloupe. Niva (16 months) tried everything and ate most of it.

Thai Rice Salad

Menu: Vegetable Potstickers; Thai Rice Salad

Lessons learned:
  1. I don't even miss the meat in these potstickers.
  2. It's not that Ben stopped liking rice.  He just doesn't want to eat it with his fingers anymore.  I guess that's reasonable.
I don't remember the last time I enjoyed a Sunday this much.  And it was really because of everything I didn't do.  Didn't do chores.  Didn't run errands.  John made us breakfast!  Then we went running, then out to lunch at Chipotle.  Then we just hung out for the rest of the day.  I actually enjoyed just sitting on the couch and watching golf.  For like three minutes, I sat there and thoroughly enjoyed it.

Then I decided to go make the potstickers early so they'd be ready whenever we wanted dinner.  I was in a great mood when I started making them.  After a while, though, I was like "is it me or is this taking forever?"  Turns out I had made 64 of them.  That's cool, so I guess I made enough for next time, too!  Today was awesome.

I looked at a couple of different recipes for vegetable potstickers and just ended up winging it.  I crumbled up some firm tofu, then put some broccoli, carrots, bok choy, onions, and garlic in the food processor.  Mixed it all up with some ginger and an egg.  After that, same deal as usual.  But I did give them their own pretty plate this time.  They were really good, but I need to fiddle with the filling a little.  When I find the right configuration, I'll post it.


I also made another rice salad tonight, Thai-inspired.  It was actually quite popular over here.  I think it could be its own entree if you're in the mood for a light meal.


Tonight, Sophie's dinner was a quarter of a pear and some milk.  She had a small snack of pretzels after her nap, which she ate after she made them walk around and talk to each other for a while.  She didn't eat anything for lunch besides her leftover Cheerios from breakfast.  She did eat some French toast at breakfast along with her Cheerios.  I will not stress about this.  I will not stress about this.  I will not...

Thai Rice Salad
OK, this is my official recipe.  However, tonight instead of making the dressing below, I decided to finish off the cilantro-lime vinaigrette I made several days ago since I didn't know how long it would keep.

2 cups sushi rice
1/2 cup water
3 tablespoons fish sauce
Juice from 1 lime
3 tablespoons brown sugar
3 tablespoons minced lemongrass
1 teaspoon crushed red pepper
1 Asian pear, chopped (tonight I used one of the Bartlett pears that New Leaf had on sale last week)
1 cucumber, chopped
1 avocado, peeled, pitted, and chopped
1/2 cup chopped peanuts, or more to taste
1/4 cup chopped cilantro

At least two hours before serving time, cook the rice and refrigerate.  Make the dressing by whisking together the water, fish sauce, lime juice, sugar, lemongrass, and pepper.  Mix the pear and cucumber into the rice and add 3/4 of the dressing.  Mix in the avocado, peanuts and cilantro, and finish with the remaining dressing.

Makes about 4 servings.

UPDATE: I think sushi rice may taste the best, but when I'm just making it for us on a weeknight, I usually use brown rice because it's healthier and works pretty well here.

Sunday, April 10, 2011

French-Style Rice Salad

Menu: Japanese-Style Egg Rolls; French-Style Rice Salad

Lessons learned:
  1. If the herbs are big enough for my husband to pick out, he'll take the time to do it.
  2. Sophie loves these egg rolls.  Thank goodness!
I know this menu sounds strange, or at least awkwardly international.  Both recipes are from HTCEV, which is full of variations on themes -- that's what I love about that cookbook -- and often those variations are sensibly named after a national cooking style.  He's got to call them something.  But if you don't think about what the food you're eating might be named -- as my family doesn't -- then it turns out the menu isn't strange at all.

We've been eating outside lately.  The kids eat at their little table in the grass, and John and I sit on the futon couch that we never ended up bringing back inside.  It's nice to get out of the heat of the kitchen after I've cooked in it and sit under the fans we have on the ceiling of our back porch.  After being sick so many days, it's also nice to get some fresh air.

You know, the only thing that seems slightly odd about this pairing is the soy sauce in the egg rolls.  Next time I might just replace it with extra broth and layer some brie into the rolled crepes.  Why didn't I think of that last night?  I even have some brie!

On the other hand, everyone loves these eggs.  It's hard to want to mess around with that.

French-Style Rice Salad (adapted from HTCEV by Mark Bittman)

Long-grain white rice, cooked and cooled
Green beans, trimmed, cut into 1" pieces, and steamed briefly
Radishes, halved and sliced thin
Carrots, shredded (I only had teeny tiny baby carrots, so this was annoying even though it looked pretty)
Slivered almonds
Fresh tarragon (didn't have any, so I used some lemon thyme from my garden instead, which my husband picked right back out)
Chives
Citrus-champagne vinaigrette (made from citrus-champagne vinegar, a Good Seasons dressing packet, and olive oil)
Salt and pepper, to taste

Toss all ingredients together in amounts that suit you!

Thursday, April 7, 2011

Cold Sesame Peanut Noodles

Intended Menu: Scented Fish Salad; Cold Sesame Peanut Noodles

Actual Menu: Scented Fish; Random Salad; Cold Sesame Peanut Noodles

Lessons learned:
  1. Just because it's at New Leaf Market doesn't mean it's a responsible purchase.  If you check out the Monterrey Bay Aquarium's sustainable seafood guide -- provided right on the New Leaf website! -- it says to avoid Gulf Red Snapper.  So why do they sell it?
  2. At some point, enough substitutions make a dish completely unrecognizable.
I'm still feeling quite lousy, but this is Day Three and at some point you have to start tending to at least some of your responsibilities again.  Last night my husband gave me a break by staying home from work in the morning and cooking his specialty for dinner, pasta with tomato sauce and Italian sausage.  He even got Publix's Greenwise Italian chicken sausage instead of whatever he would have gotten when we were younger (probably Johnsonville).  It was a lot like the pizza we'd had the previous night and there was no vegetable dish, but someone besides me cooked it and it was delicious.

My kids aren't really eating.  It's not just that they're not trying things at dinner, but they're even abandoning crackers, bread, and apples at the table.  Sophie has barely eaten anything in days.  I'm trying very hard not to stress about it, because she isn't asking for other food and doesn't seem to be uncomfortable.  Maybe they are both coming down with my cold and just don't feel like eating?

After two days shacked up in the house, I took the kids to New Leaf Market, mostly for some produce.  I'm still trying to understand the availability of mangoes and avocados in this region, because all of a sudden they are more expensive again (both priced at $2 each at NLM).  I would think that they would be more in season in warmer weather, but no?

I needed to get fish, and saw that the snapper in NLM's seafood section was $2 off.  I knew it was risky not to get it from a fish market and I wondered why it was marked down as well, but not feeling well, I was happy not to have to make a separate trip so I took the chance.  The fish turned out to be tasty, but looking it up later I see that it's not harvested sustainably.  I really wish that by shopping at New Leaf, I could feel confident that what I'm buying is at least somewhat environmentally responsible and sustainable.  I sort of thought that was the whole point of the co-op, and I'm willing to pay more for that confidence.  But just like at any other store, it turns out I have to do all my own research.  It does frustrate me.

There's a recipe for Scented Fish Salad in my Thai cookbook, and it looks great.  However, it called for cucumber, mangoes, and something called pitaya, also called dragon fruit.  None of these were available to me, but I figured that I could ad-lib it a little bit and I'd get the idea.  Well, what I ended up with was some lettuce, tomato, and apples which I still tried to dress with a coconut-lime dressing (my standard cilantro-lime vinaigrette with some leftover coconut milk whisked in).  It didn't taste bad.  Well, actually I really don't know since I honestly can't taste much right now.  But I'm pretty sure it wasn't disgusting.  Not yummy, though, either.  Just kind of weird.

The fish, though, was quite good.  I cut it into strips and marinated it in some spices: ground coriander, fennel, cumin, and garlic, plus some sugar and oil.  It was supposed to go on top of the salad, but it seemed like it would just wilt the lettuce, which I hate, especially when all I can really sense right now is texture.  So we just ate the fish by itself, and it was yummy.  Tilapia is a "best choice" according to Monterrey Bay Aquarium, and I think this way of preparing it would work just fine with that fish.

I've been wanting to try this peanut noodle recipe from HTCEV for a long time, especially since my husband seems to like anything prepared with peanut butter.  It's super easy, and I ended up doing a blend of tahini (sesame paste) and peanut butter so as not to be overwhelmed by the latter flavor.  Recipe below.  If you use regular semolina noodles instead of egg noodles, it's vegan.


Cold Sesame Peanut Noodles

8 ounces Chinese egg noodles or other long pasta, like linguine
2 tablespoons dark sesame oil
1/2 cup tahini, peanut butter, or a combination
2 tablespoons sugar
3 tablespoons soy sauce
1 tablespoon minced pickled ginger
1 tablespoon rice vinegar
Chile sauce to taste (we left this out for the kids, although I might add some on the leftovers to clear my sinuses!)
1 large or 2 small zucchinis (original called for cucumbers, but there were locally-grown zucchinis at NLM) 
Fresh ground black pepper to taste
1/4 cup minced garlic chives (I forgot these, unfortunately...use scallions if you prefer)

Cook the noodles as directed on the package.  When they're done, run them under cold water and/or toss them with ice cubes.

Meanwhile, mix together the oil, paste(s), sugar, soy sauce, ginger, vinegar, and chile sauce.  Toss the cold noodles with the mixture, then peel the zucchini and grate it into the noodles.  Toss again, then garnish with black pepper and chives.

Makes about 6 side servings.

Homemade Mac 'n Cheese

Last night we had some wonderful friends over for dinner. Sam and her two girls who happen to be the same ages as my girls! Both husbands weren't able to be home for dinner so we had a girl's night complete with talking about our periods, 80's music on Pandora, and lots of giggling little girlies. It was fantastic.

I was 14 years old the first time I had macaroni and cheese from a box. I was staying with a friend and I loved it! My mother, chef du jour de la homemade food, was horrified. Since then I've elevated my tastes from Kraft to Annie's in a box but I'm back to realizing homemade is really the best.

Lessons learned:

- Food is always better when shared with friends.

- Homemade macaroni and cheese is a crowd-pleaser (unless your crowd includes someone dairy-free, which our party did not last night)

- A mix of american and sharp cheddar give the pasta slight twist.

- Fruit salad is extra delicious with a little bit of cinnamon.

- When I'm really hungry it's easy to forget to take a picture of the meal.

The official menu:
Homemade macaroni and cheese, broccoli, peas, fruit salad

Mac 'n Cheese My Mom's Way

1 box of elbow macaroni (last night = 1.5 boxes)
1 lb of American cheese (last night = plus 1/2lb sharp cheddar cheese)
Milk
Butter

Boil the elbow macaronies according to the box directions.

Drain the noodles and pour them back into the big pot.

Add some butter. (a couple tablespoons should be enough but it's all about personal taste)

Add some milk. (a tablespoon at a time as needed)

Break the cheese into small chunks. Add a few at a time stirring constantly.

Continue adding milk and cheese until the consistency looks good to you.

Eat. And if you're like me and my dad you'll want to add some pepper to your bowl.

Monday, April 4, 2011

Fresh Pasta Ravioli with Ricotta Cheese Filling

Menu: Fresh Ravioli with Ricotta Cheese Filling; Random Crunchy Salad with Mustard Vinaigrette and Rosemary

Lessons learned (so many tonight):
  1. The first thing you need to do when making homemade pasta is pour yourself a glass of wine.
  2. The food processor doesn't make mixing the flour and egg any easier.
  3. Flour.  Flour.  Flour.  Flour.  Flour.  Flour.  Flour.  Flour.
  4. The pasta maker is not my friend.  Not yet, anyway.
  5. Roll the dough through the pasta maker in small batches.
  6. Flour, and flour some more.
I love fresh pasta, and I love ravioli.  When I got married, one of the things I put on our registry was a pasta maker.  I also added a ravioli attachment that turns out not to work so well, which I found out after a blood-boiling seven-hour stint in my mother-in-law's kitchen one evening (finally served dinner at 10pm, very grumpy).

Even without the ravioli attachment, my pasta maker is not what I would call user-friendly, but at least you can learn the pitfalls and get used to them.  Not that I have, but I'm trying.


Tonight I got the idea to let my food processor do a lot of the kneading of dough.  It's no electric mixer, but it has a dough attachment, right?  Definitely not worth it, as it turns out.  I still had to do plenty of kneading, and just ended up getting a big dish dirty.  This is the first lesson I learned.

After messing with my pasta maker for several minutes and learning that I needed to practically drench it with flour due to the consistency of the dough, I finally started rolling some sheets successfully.  That's when I realized that I should have opened the wine first thing.  I'd like to claim that my unkempt hair below is a result of my efforts in the kitchen, but I'm pretty sure it was looking that way all day.


As I was making the sheets, I had problems with them getting too long for me to handle, or too sticky to make it through the thinnest, most hazardous, setting.  I learned to use pretty small clumps of dough -- like just big enough to fit in the palm of my hand -- and eventually I abandoned the last setting.  Next time if I have more patience I might try it again.  Here's what I finally ended up with:


Wow, that's a lot of flour.  And you know what?  THEY STILL STUCK TOGETHER.  And to the paper underneath.  Rrrrrrrrrrgh!  OK, so next time I will dump a cup of flour onto the paper and definitely not let any of them touch each other.  You will also notice that they are not gorgeous.  After all the frustration with the pasta rolling, I decided I couldn't care less if they were pretty.

Let me address the obvious question here.  Why make my own ravioli from scratch?  Is it really that much better than frozen ravioli, or especially the fancy fresh ravioli that you can buy in many stores?  I don't know if this would be true for other people, but my answer is yes.  The filling was so fresh and fantastic.  Not even in the same category as cheese ravioli from the freezer section; plus I got to use organic ricotta.  Also I love that you can flavor homemade pasta any way you want.  I just went with plain for tonight because I was so rusty on the prep, but in the past I've done spinach and lemon-pepper and they were yummy.  I would also love to do roasted red pepper and one full of Italian herbs.  The possibilities are endless.  And the more I do it, the easier it will be.  I'll get my method down.  And they really were yummy.


I had to do a blind shopping trip this afternoon while we were out, so I ended up just throwing together an odd salad of lettuce, apples, carrots, radishes, and croutons.  I threw in some rosemary and dressed it with the last of my mustard vinaigrette.


Fresh Pasta Ravioli with Ricotta Cheese Filling

2 1/4 cups all-purposed flour, plus more as needed (I needed LOTS more)
1 teaspoon salt
3 eggs

1 1/2 cups ricotta cheese
1/4 cup grated hard Italian cheese, such as Parmigiano-Reggiano or Pecorino Romano
1/4 teaspoon nutmeg
2 cloves garlic, minced
Salt and freshly ground pepper, to taste
1 egg

OK, so most recipes for fresh pasta that I've ever seen say to just pile your flour on the countertop or table and then make a "well" in the middle for your eggs, which you then start cutting in with a fork.  I much prefer to just use a bowl!  Put the flour, salt, and eggs in a small mixing bowl.  For me, it worked to keep my canister of flour open and next to me with a scoop at all times during this process; that way I could always dip my ball of dough right in it if needed, or sprinkle it over any of the surfaces I was using.  Once you're all set up there, just start kneading and keep going until the dough isn't sticky anymore.  When it's the right consistency, cover the bowl with a damp towel to prevent the dough from drying out as you work.

Next make the filling, so it's ready to go when you need it.  Just mix the cheeses, seasonings, and egg together in a bowl and keep it next to your work area with a small spoon.

I happen to have a pasta maker, so I'll give directions for that.  For ravioli, you could try using a rolling pin, but that's just not going to get the dough as thin as a pasta maker will, so be warned.

Divide the dough into 8-10 pieces.  Each piece may seem small, but as you feed it through the pasta maker at each setting, it can get very long and hard to manage without tearing it.  Clamp the pasta maker to your counter or table, attach the feed tray, and turn the dial to the thickest setting (on my machine, that's number 1).  Feed your first piece of dough through each setting once or twice, trying to keep the sheets straight and even as they go through.  My dough was fine going through only once on each setting until I got to the thinnest one.  If you're going to use the thinnest setting, you probably need to feed the dough through the previous setting at least twice beforehand.  Mine tore and crimped each time I didn't do that.

Now you need to decide what size you want your raviolis to be.  I ended up making larger ones.  In my opinion these are tastier because there's a larger amount of filling to be had in each one.  But they can look kind of shapeless and sloppy, too.  If you want the large ones, lay out one sheet of pasta horizontally (from your view) on a floured surface and spoon large globs of filling onto either the right or left side of the sheet, spaced out by about 1/2" - 3/4".  Then fold the other side over the filling side and press down around the globs to seal them in.  If you're worried that it won't stick, sprinkle or brush a little bit of water on the dough first.  If you want to make smaller ones, you can put smaller globs of filling all along the horizontal sheet on the half closest to you, then fold the far half over toward you and seal in the filling.  When you're done, cut the squares with a pizza cutter and arrange them on a floured tray.  Repeat until the dough and filling are all used.  You can get 20-25 large raviolis or maybe 35-40 smaller ones.

Boil a large pot of water.  When the water is boiling, add the raviolis but make sure you don't overcrowd the pot; they're done when they float at the top.  It takes very little time, like less than 2 minutes.  It's easy to work in batches if you have a slotted spoon or similar tool to fish the raviolis out when they're done.

Serve immediately with your favorite tomato sauce and some grated cheese.  And save some wine for when you're eating.

Saturday, April 2, 2011

Bean Salad with Corn and Tomatoes

Well, looks like I was wrong about having no more dinner guests for a while.  I'm happy to be; I love having people over.  And now that we are mostly meatless, my husband is all the more eager to take hosting opportunities so he can grill some meat, like a man!  He invited over a colleague and his wife, who is due to have a baby this month so we figure we probably won't be seeing them much in the near future.

John and I had another one of our little discussions before our dinner, sparked by his realization that the local, grass-fed ground beef I get costs $7 a pound.  I don't mean to trivialize things; it's just that neither of us ever says anything new.  The gist is that my husband is a nostalgic person who has, for pretty much his whole life, thought of grilled burgers as a delicious and cheap meal, and he is still in mourning for the loss of that second attribute.  He believes me that cows' digestive systems aren't designed to process corn, that it makes them sick and more prone to E. coli and "superbugs" that are resistant to antibiotics, and generally fills their increasingly short lives with pain and discomfort.  And tonight his colleague, who grew up on a farm, told him that grass-fed beef contains more nutrients as well.  It's just that there was a time when we would grill burgers every weekend and think nothing of it.  (Yes, I am aware that this is the second weekend in a row we've grilled burgers! It's unusual.)

John made a point about how if we had less money, we wouldn't be able to shell out for ground beef like that.  I told him that if we had less money, I wouldn't be buying cheaper beef; I just wouldn't be buying beef.  To be clear, this is a perspective I've worked up to over the course of about two years.  When we go to a restaurant, I still try to avoid beef (and other meat), but sometimes I do have it and in those cases I'm sure it's corn-fed.  So this is not an issue about which I have any standing to be self-righteous.  Food choices are intensely personal, as my kids teach me every day.  Unfortunately, we have mostly lost our ability to make those choices based on information about how that food is produced.  The results are worsening health, environmental damage, and prolonged suffering for millions of animals, some of which are more intelligent than the dogs we keep as pets.  I can't live with that, so I'm trying to be the change I want to see in the world.  It is not easy.

It's especially not easy because I can pretty much count on my kids to eat meat when it's served to them, so that's just one more reason I like burger night: it always makes me happy when my kids eat dinner.  Tonight, Sophie ate her meat, the bun, pineapple chunks, and some strawberries that John's colleague brought for dessert.  Ben did much better, as usual: he ate his meat, his bun, pineapple chunks, some guacamole, and some cheese.  Oh, and we had chips, too... and then ice cream after that.  It was a good night for the kids.

I also made this bean salad with corn and tomatoes from allrecipes.com, recommended to me by my friend Daniela!  I didn't make it exactly as written, and I probably should have.  The dressing looked like a cilantro-lime vinaigrette that I already had made, so I just used that instead of mixing up a new one.  But this recipe calls for some sugar that I think was missing in my version.  It was still very fresh tasting, and a great substitute for that second burger I might have eaten!  Very filling, though.  I don't think the four adults even got through half of it.  I guess I know what I'm having for lunch this week.